Well this time on the big proper blog so I can give it a little more structure than on fedi and have easier access to images and galleries than on writefreely.
Kinda funny to write non-Light-Novel related post on here but it is only visiable with a direct link so all is fine. lol. Today I want to give some insights into a WIP and the process of making my first Lolita Jumper-Skirt (JSK for short). Surely was something I wanted to do for a bit even more after I finished my first Lolita Sewing project very recently. I took a little break from sewing afterwards, but I did know I wanted to do more cool stuff.
The pattern / inspiration
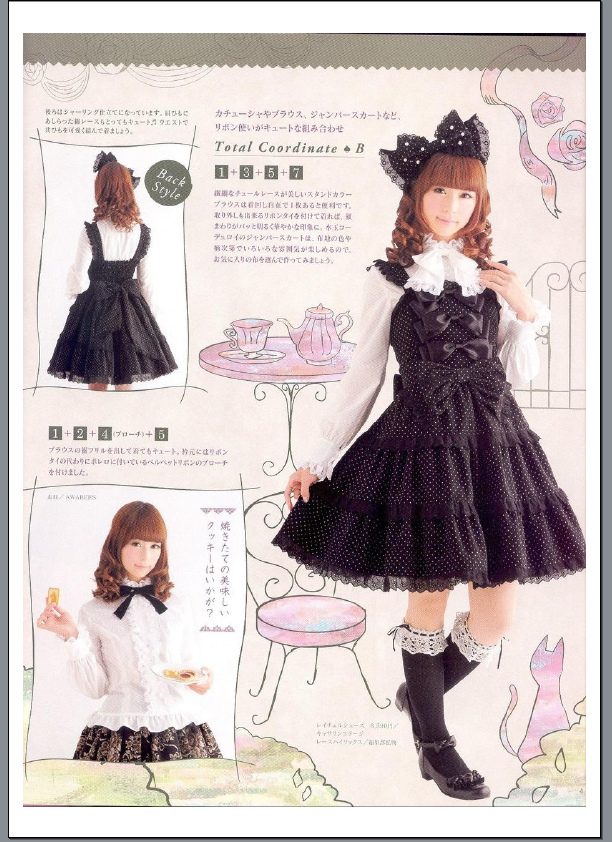
The one thing above was from Otome no Sewing Book Number 18. Otome no Sewing is a Lolita Sewing magazine that shows off various different things from the fashion and includes patterns for it as well for all your DIY needs. Obvs. they are all japanese so it can be hard to understand but atleast the japanese also sane units not like american sewing patterns…
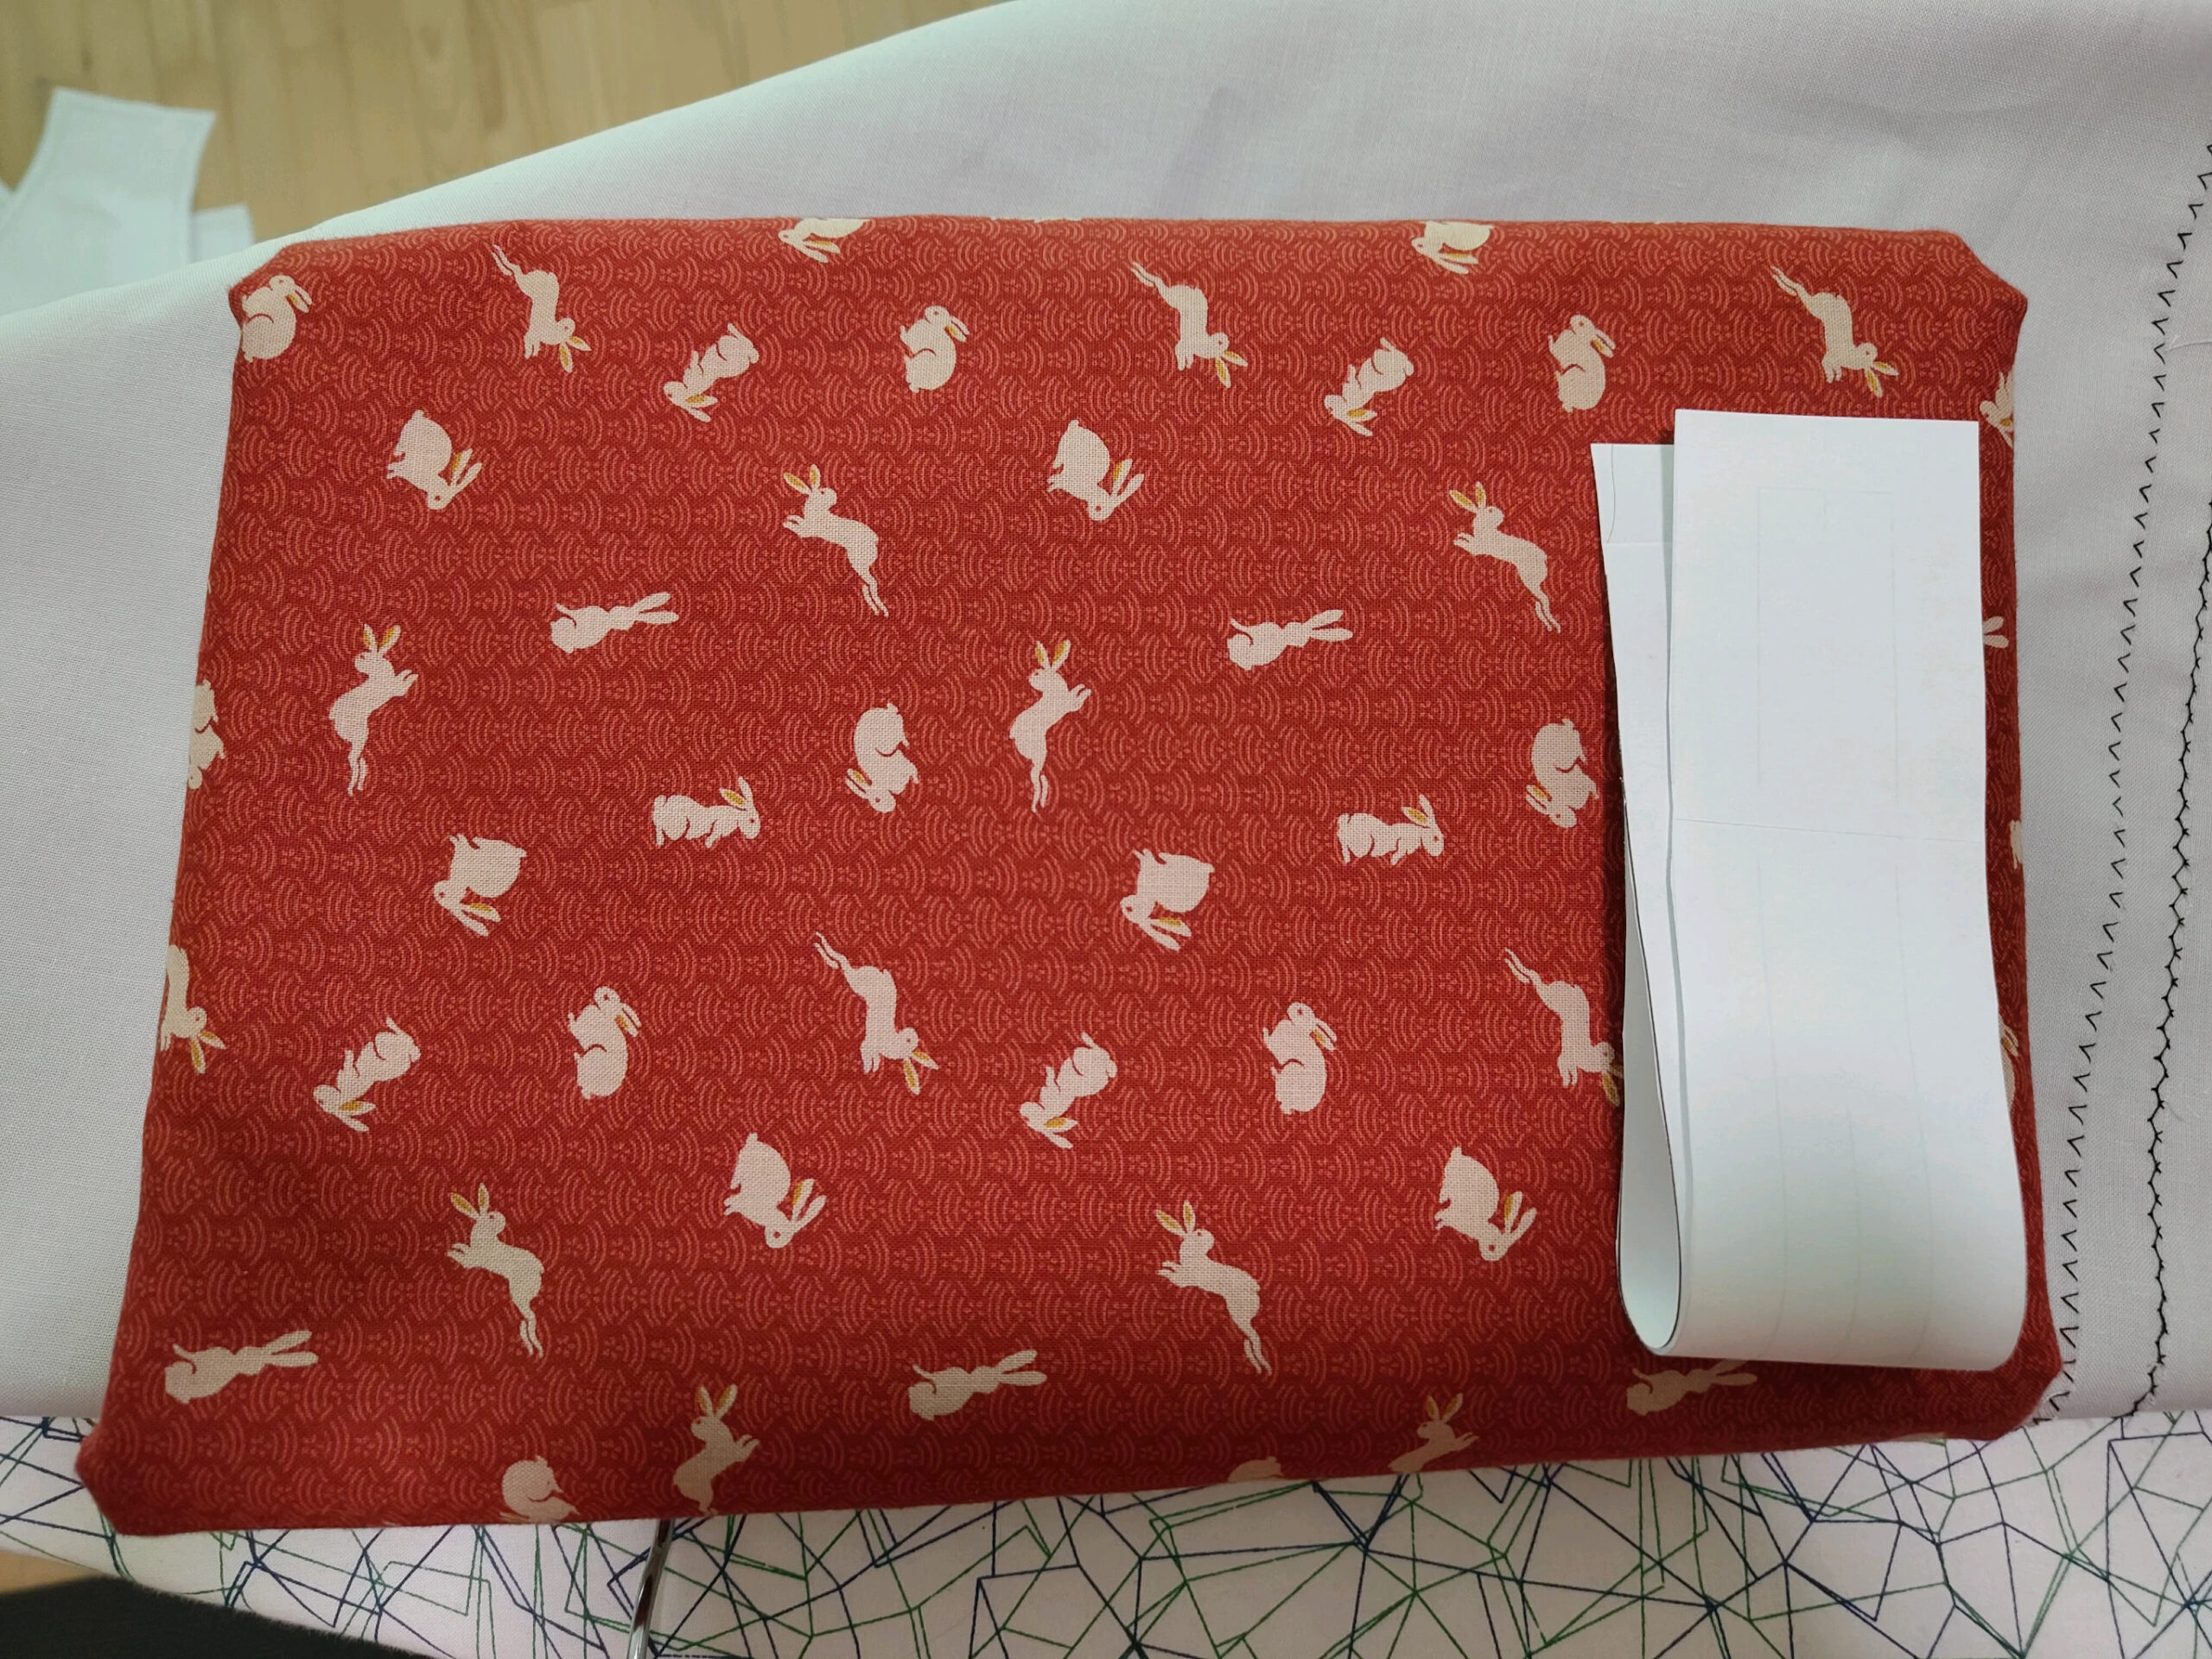
I did find a nice fabric at my local store to make the JSK out of. A Nice japanese fabric just the right inspiration was missing. So I bought some more Otome no Sewing Books and found something nice in a pretty old Issue. Number 2 which is from like 2012. So there is only scans availiable and they can vary. Atleast Book 20 (from this year had a similiar-ish piece if I got stuck somewhere with the assembly… (click to enlarge)
Pattern Making & Printing
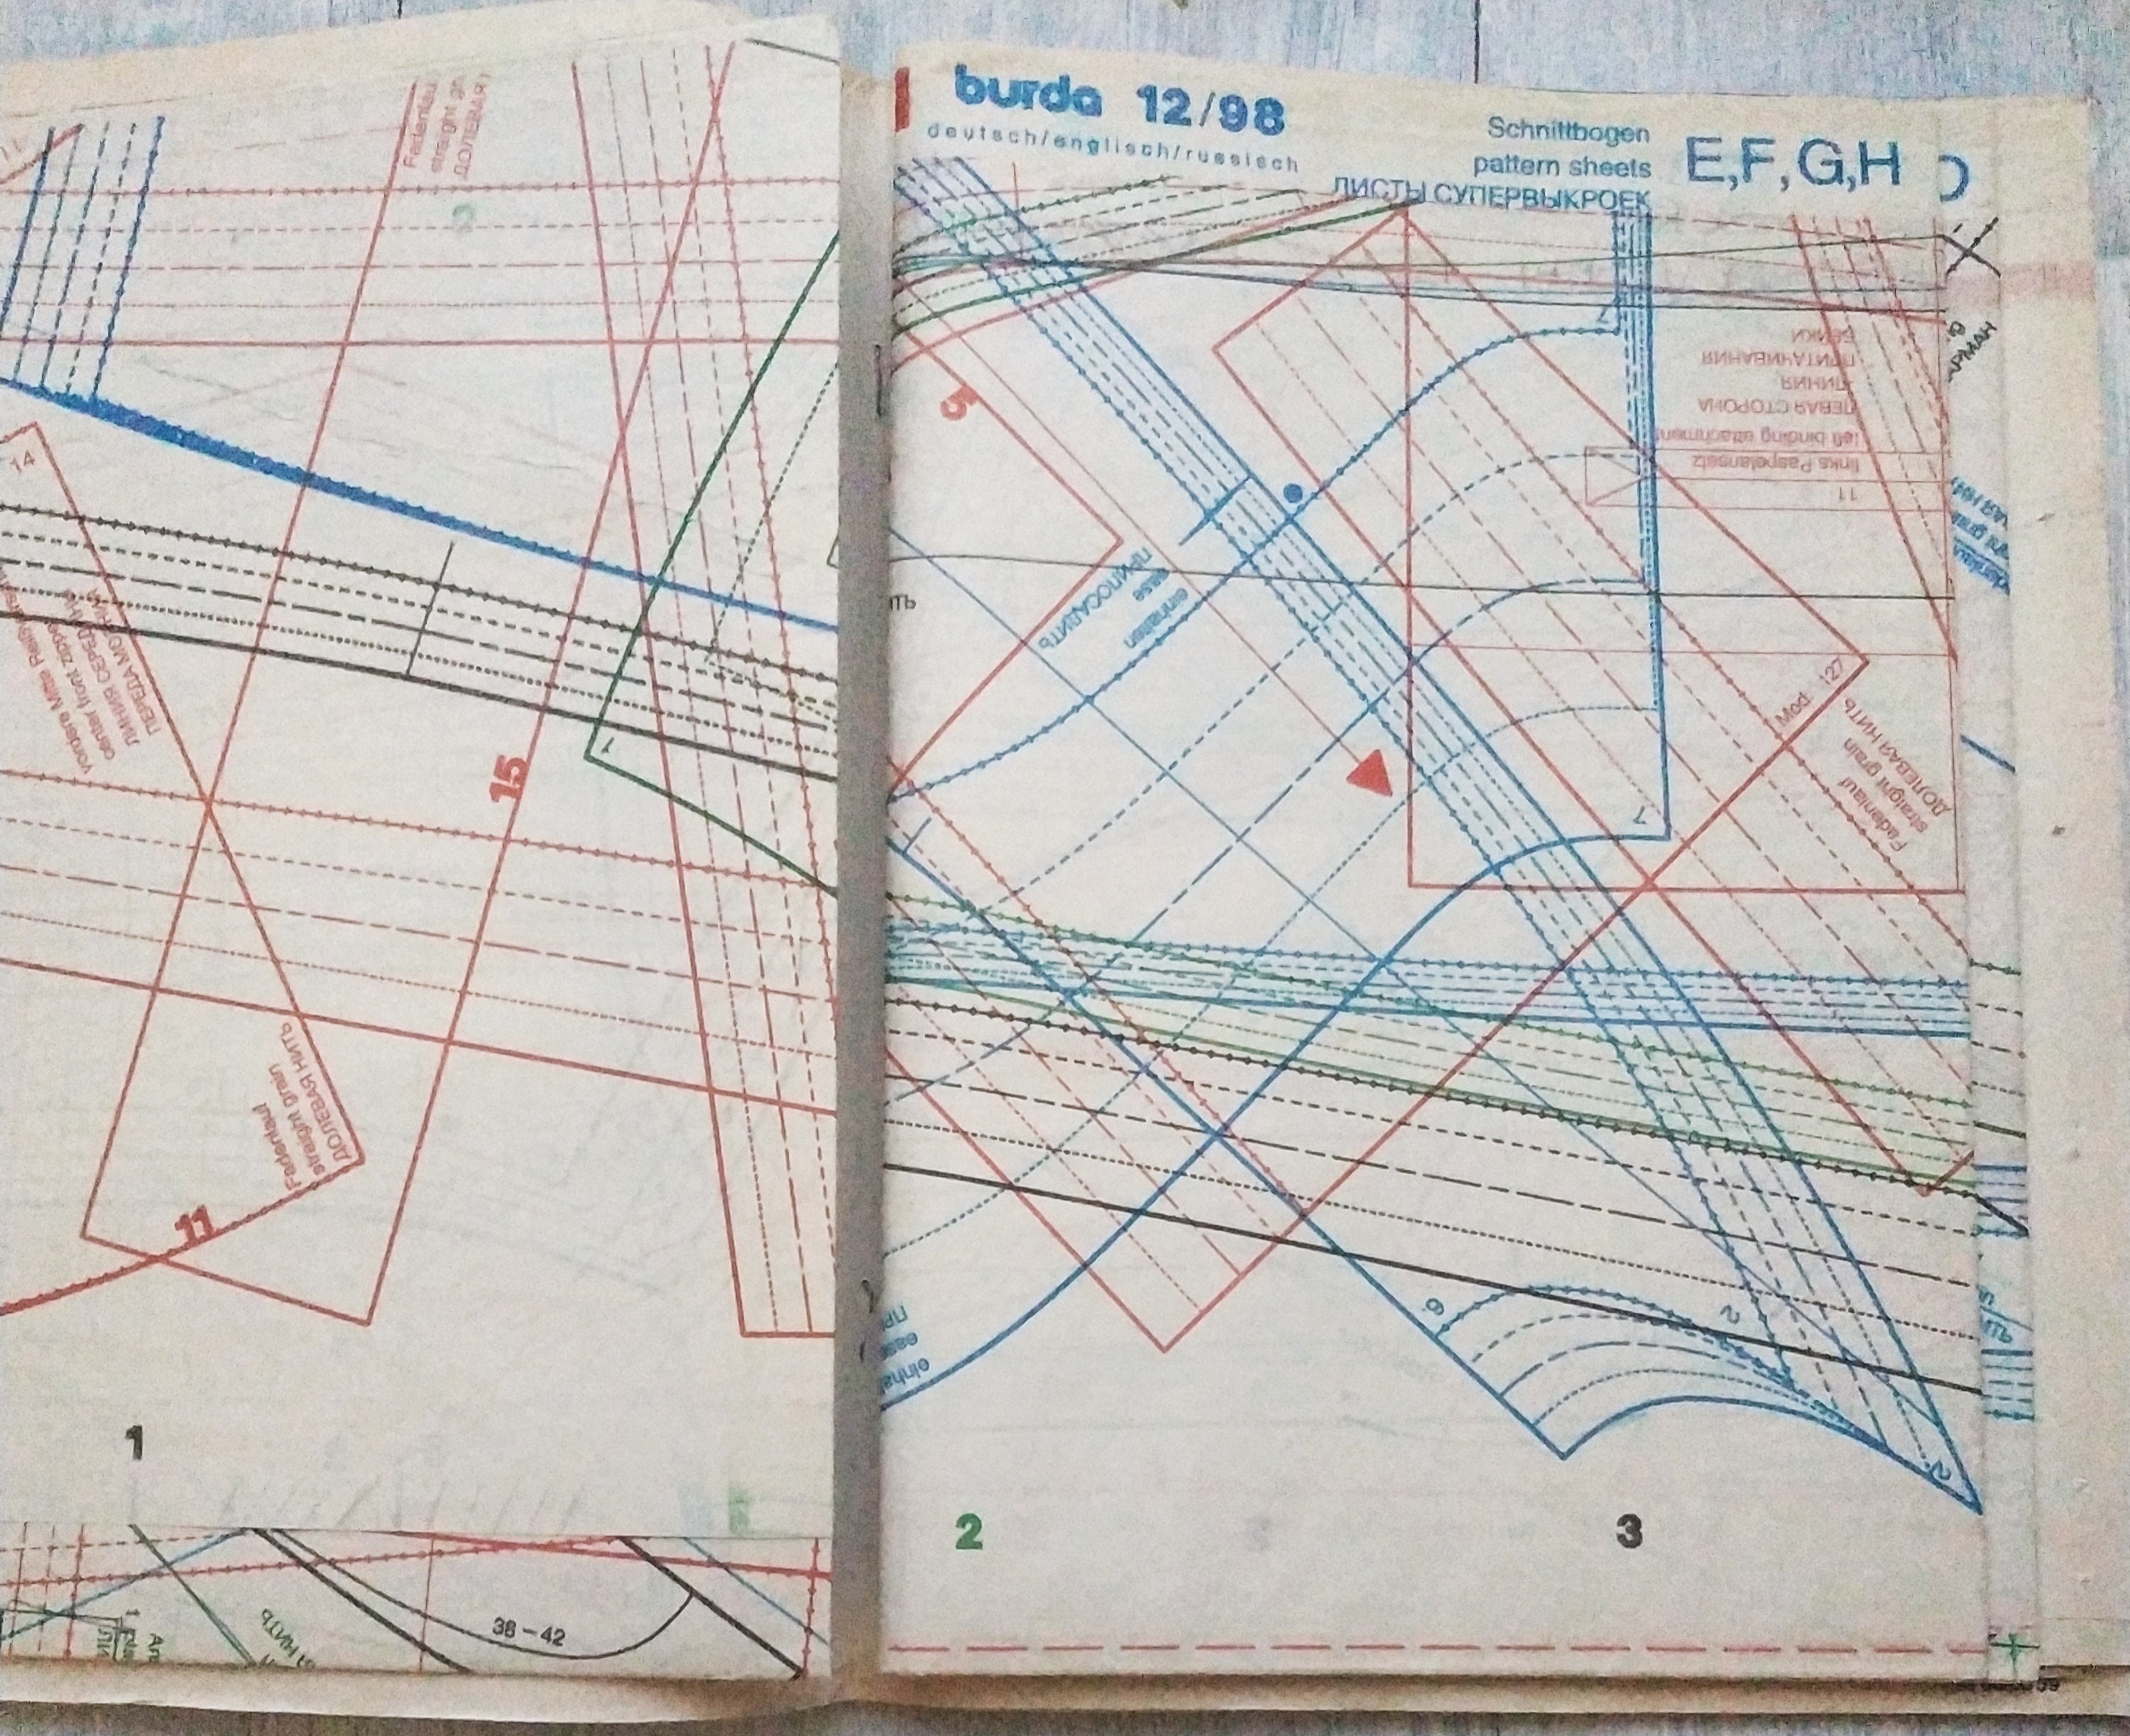
Obvs. the digital editions of the sewing magazines do not include the full size pattern like the printed version does include a full-size where all the pieces are stacked on top of each other and separated by style of line and color. Here is an example what this might look like. Those are surely to work with. You will need to trace the different pieces from such things using tracing tools. The magazine also does include measurements of all the pieces of every pattern in the back so you can recreate them yourself and make adjustments where needed that way. Super handy. Some examples how the blocks themselves can look: (Click to enlarge)
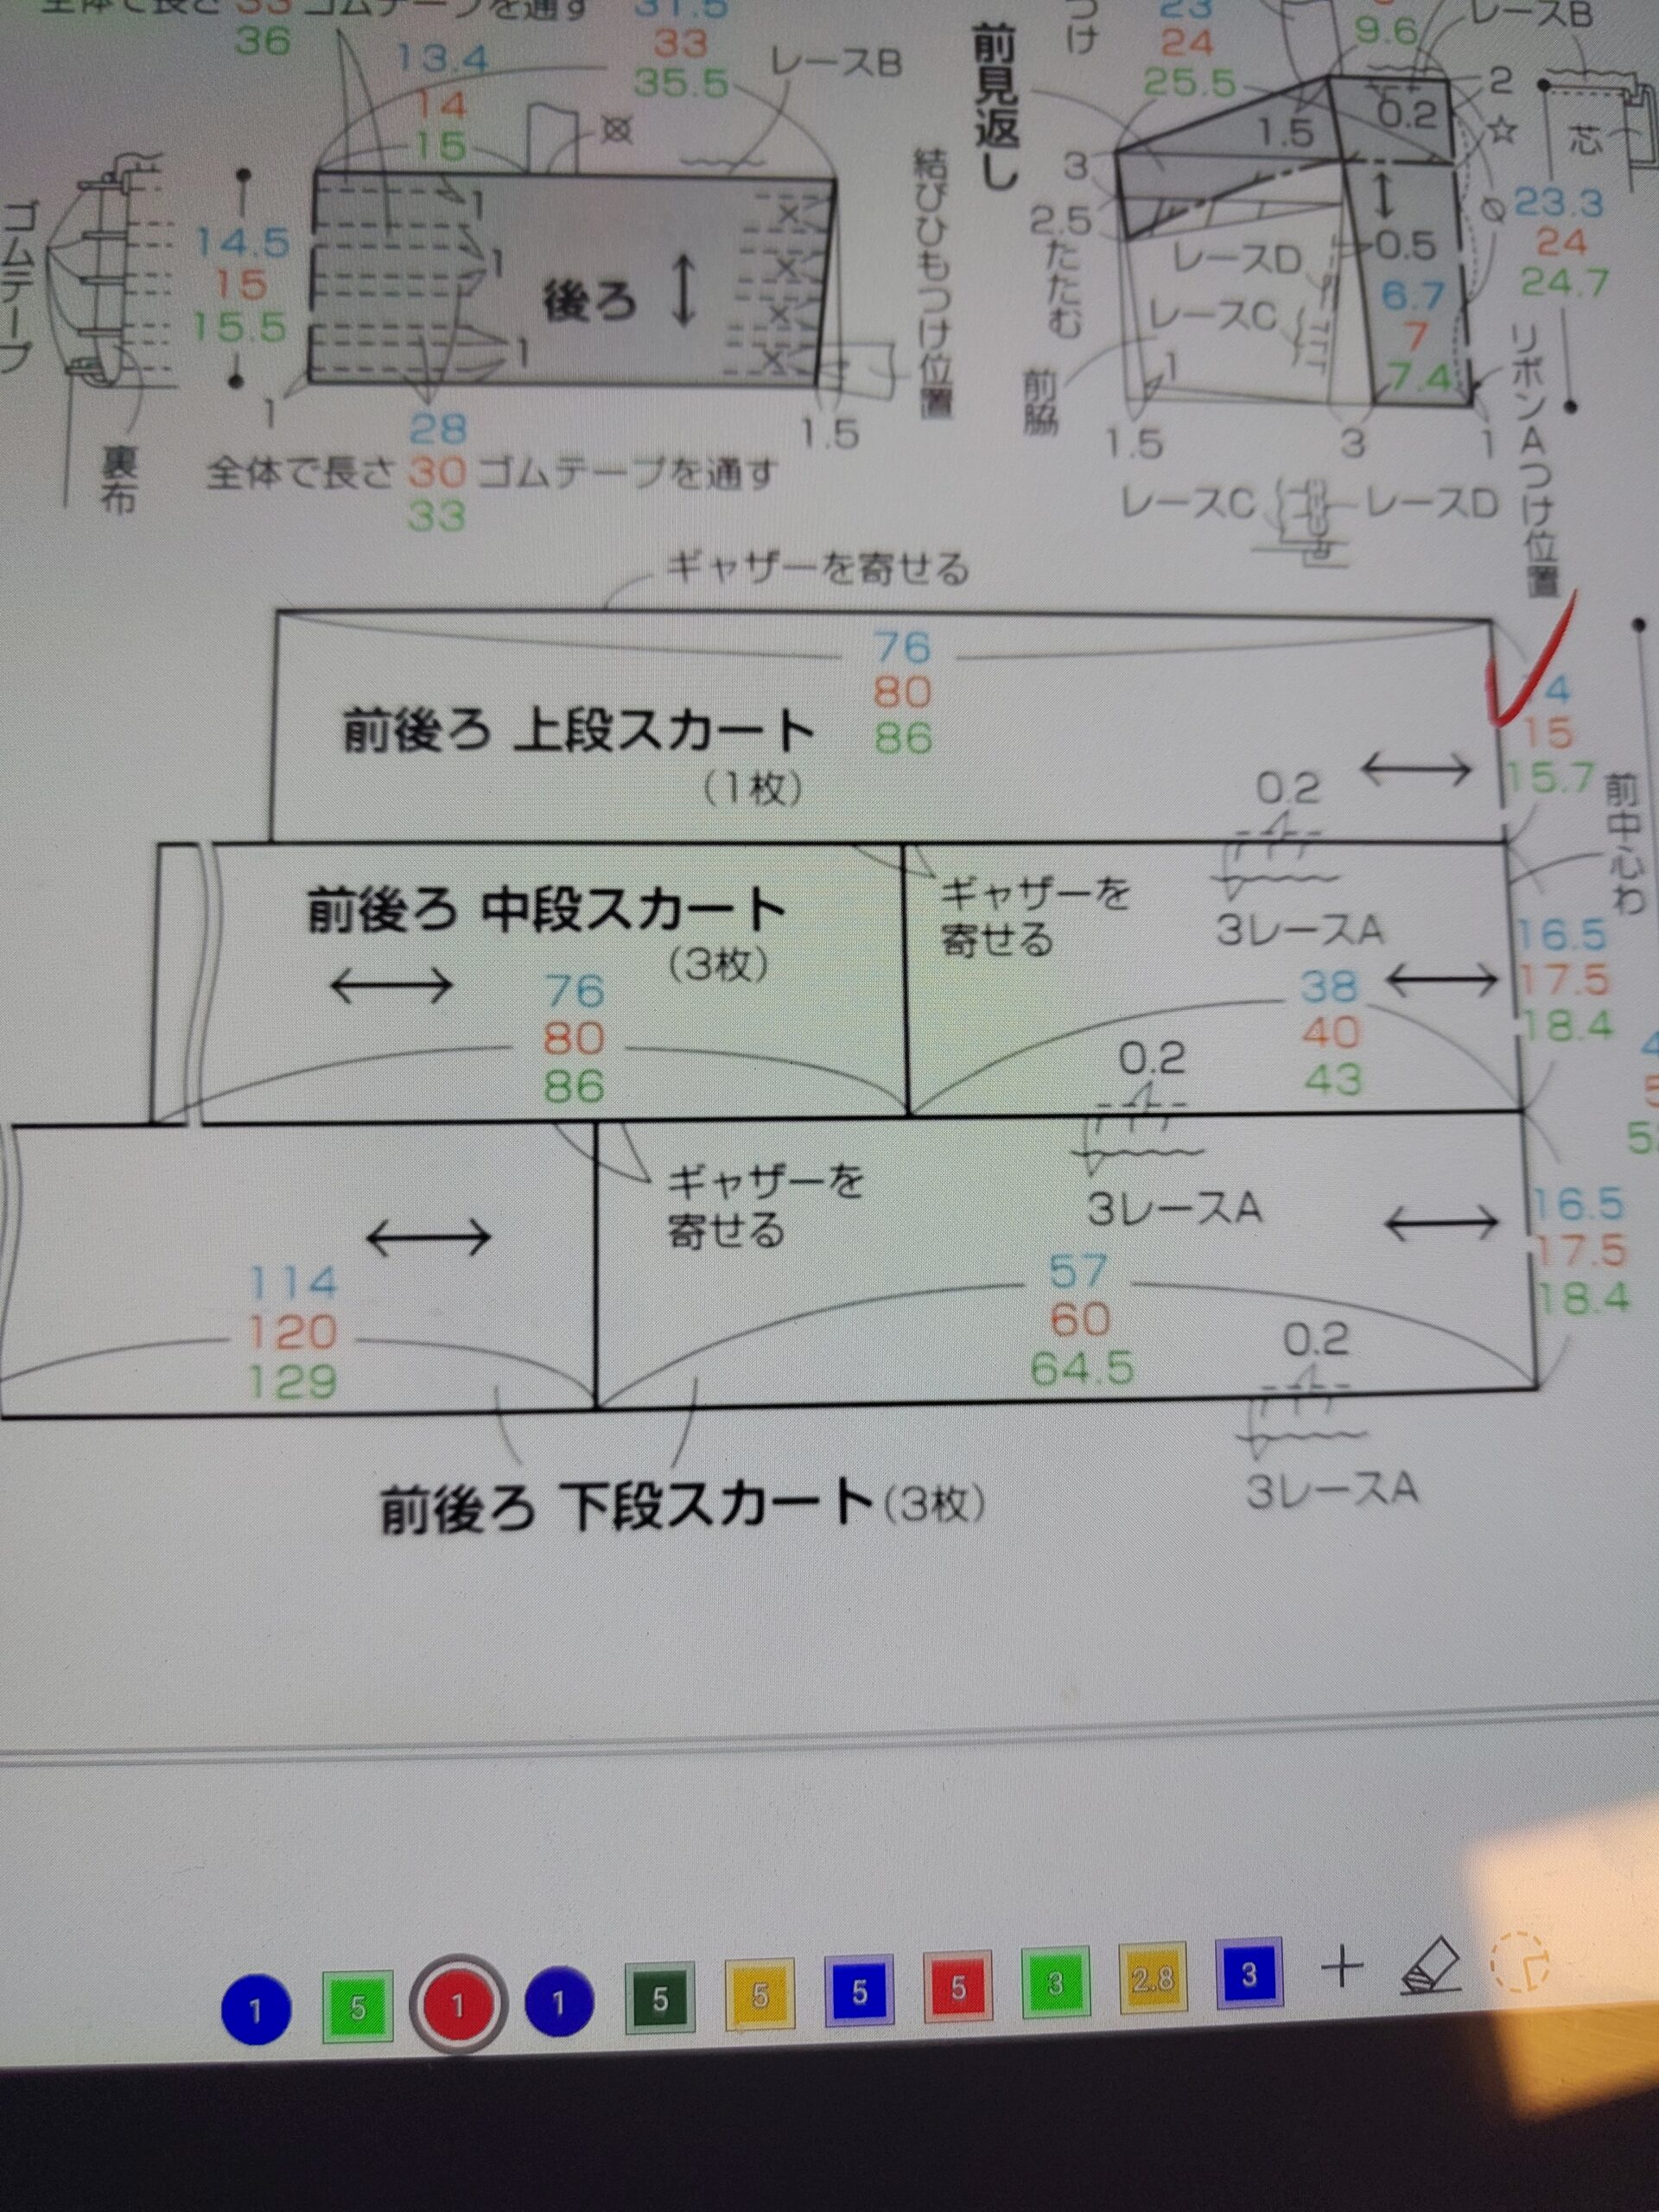
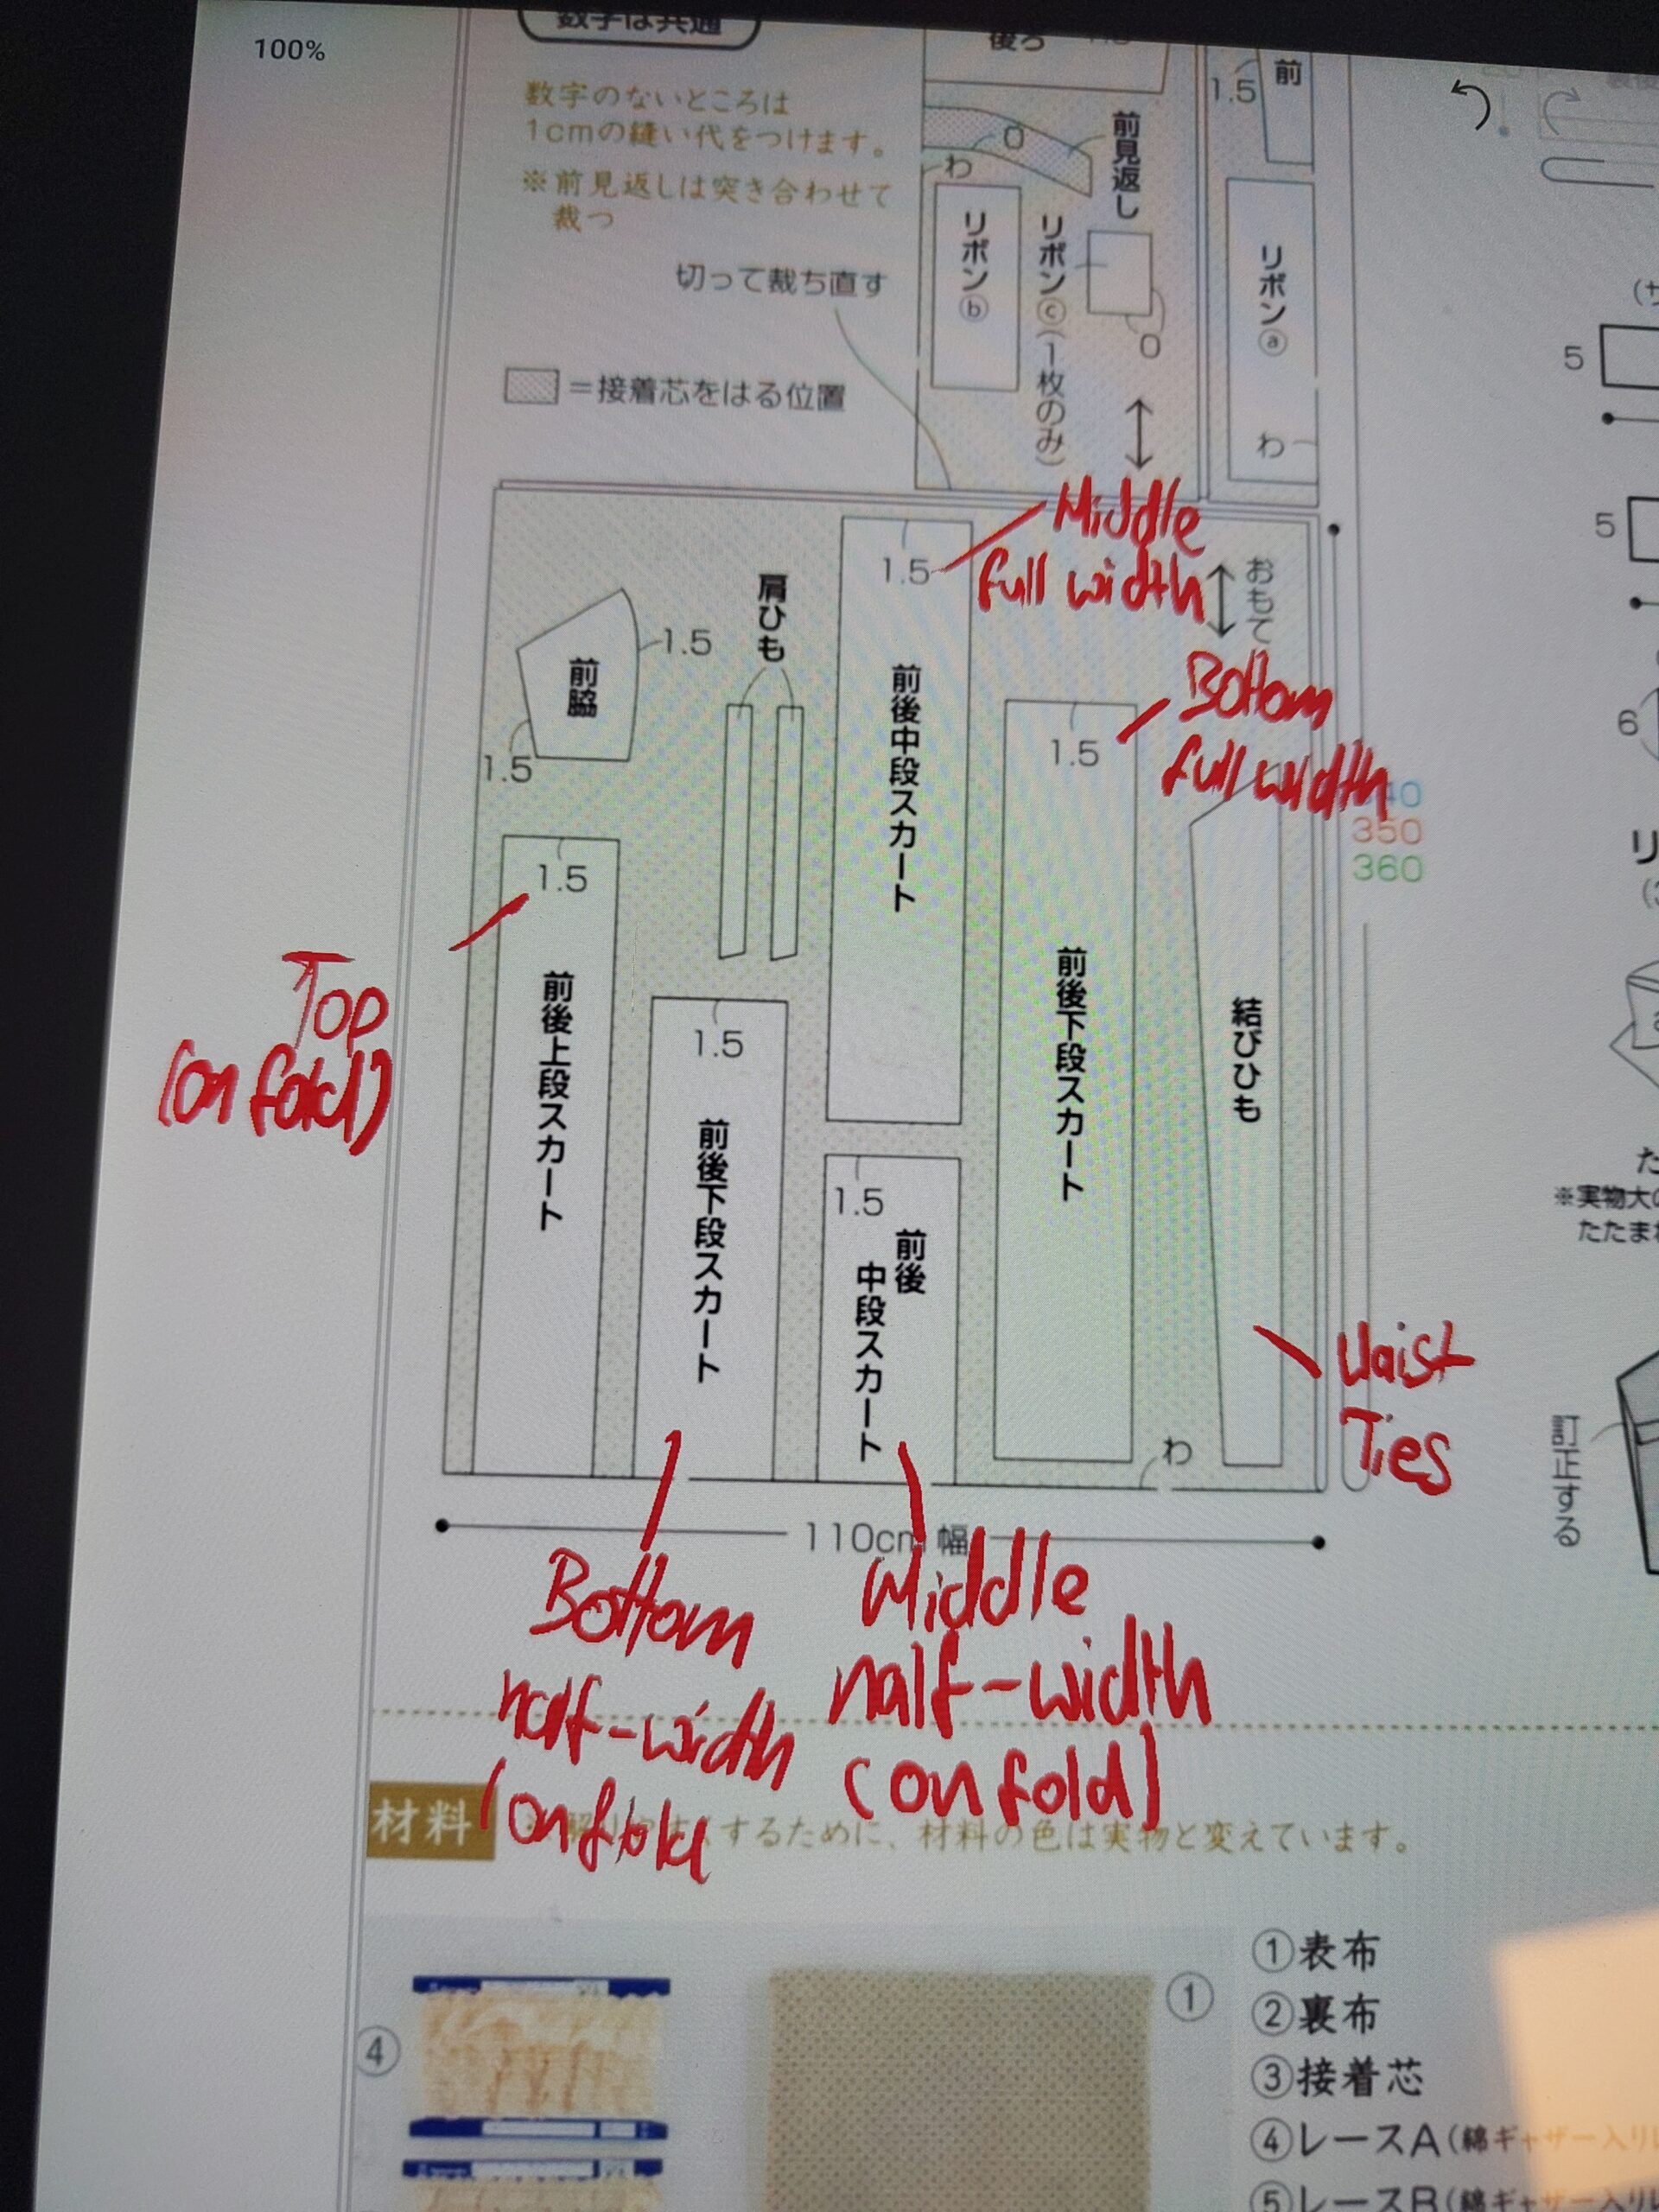
The japanese patterns can be hard to wrap your head around even with stuff like deepl image translator or google lens. Some notes may be helpful. It took me a while for example to figure out that they wanted two pattern pieces for each layer of the skirt. One full-length that is cut on the fabric and another half-length one that is cut on fold so you get 3 similar size pieces with the best use of the doubled up fabric.
I will come back to what you see on the top right on the first image as well it sure is a *a way* to make a bodice-pattern (upper part of a dress / JSK)
The pattern for my other project I bought from a patterning service since I did not know how to make them myself. I also bought one for this project but more as a backup if I could not replicate the pattern correctly.
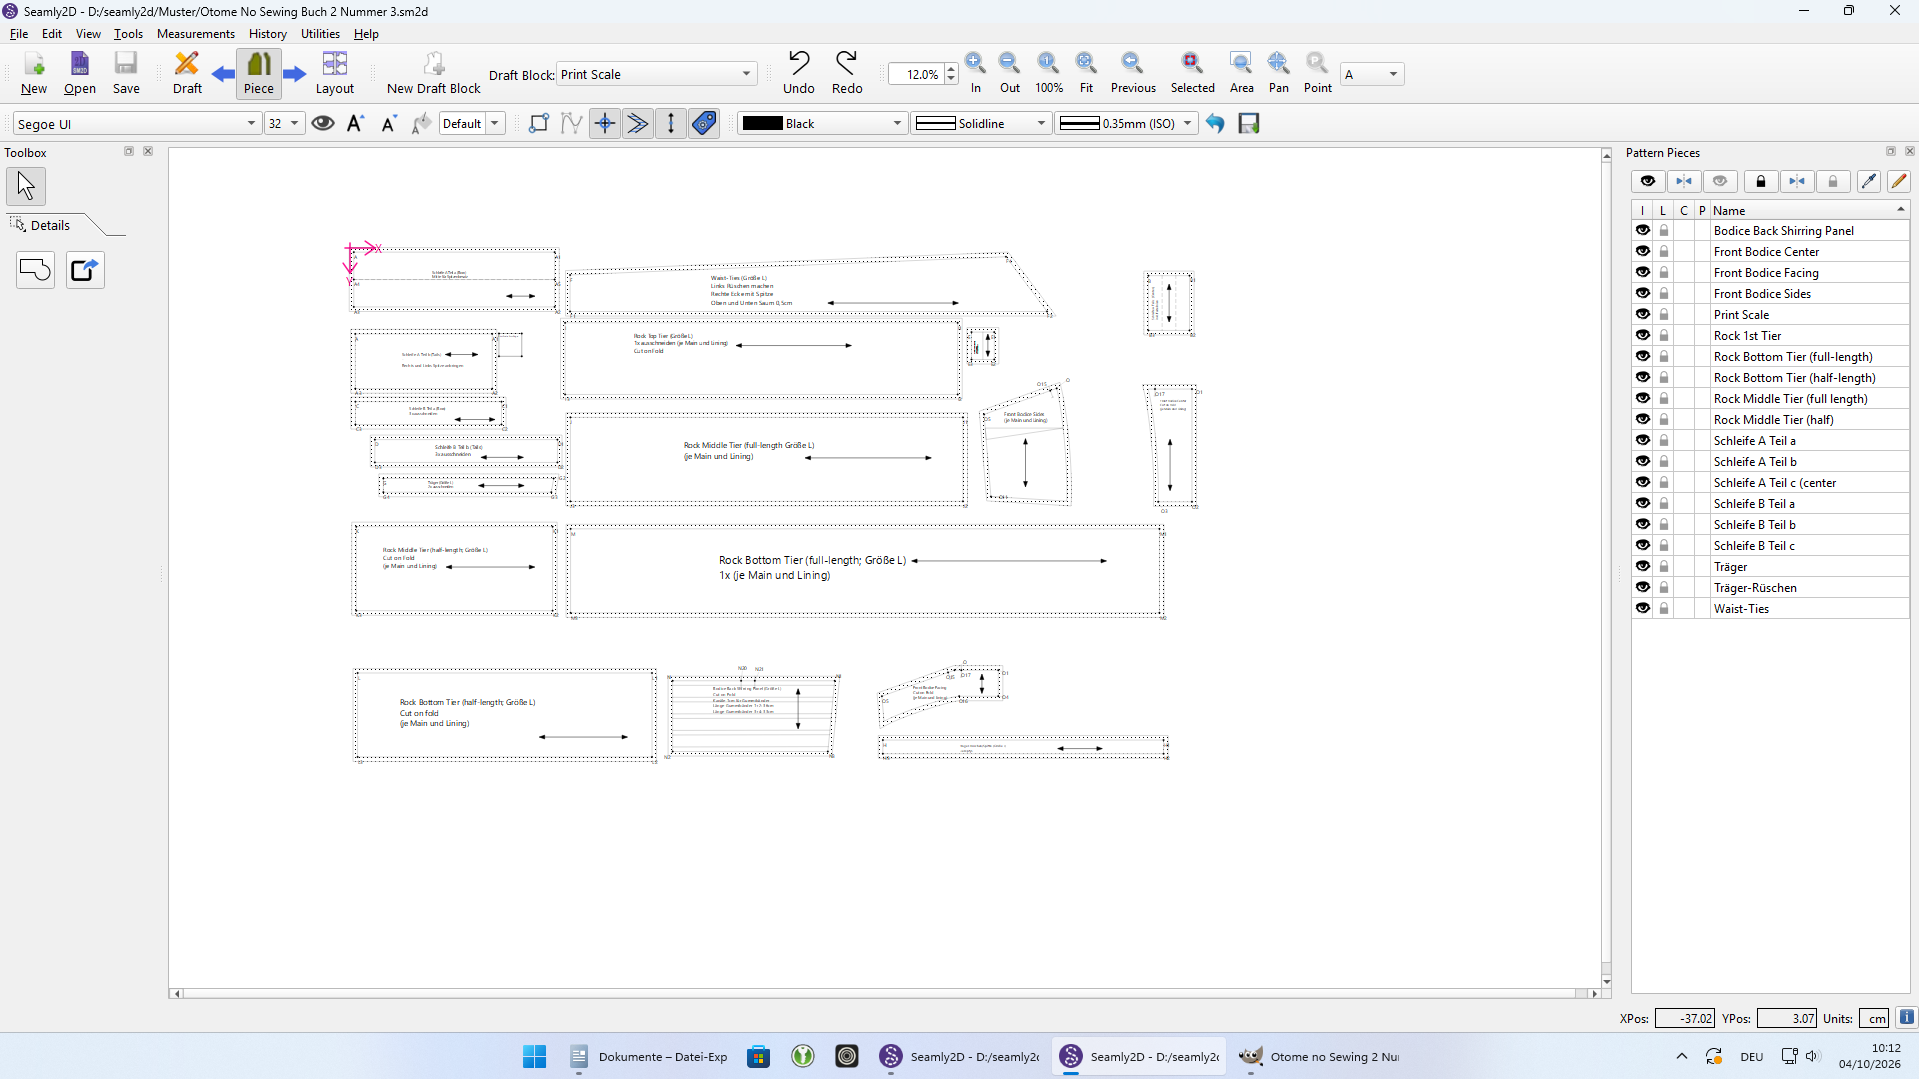
I found a FOSS program for pattern-making: Seamly2D
Like with every good FOSS CAD-thingie it is full pitfalls and weird design decisions:
- using a tool (e.g. making a line from a point) deselects the tool. So if you wanna make another line with the point at the end you have to select the tool again. Why would you design it that way? Maybe there is a setting for that?
- It is very particular about how it wants pieces to be added to the pieces view. You cannot just select the points and lines and the piece is added to the piece view. No you to select them in a specific order: anti-clockwise.
- The pattern thingie is bascically unusuable. it tries to fit pieces whatever way it can. Its very fiddly and weird for sure.
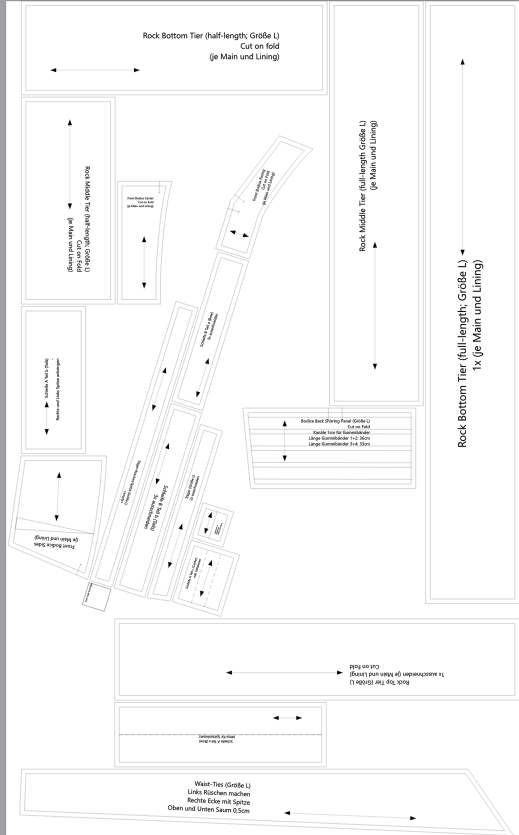
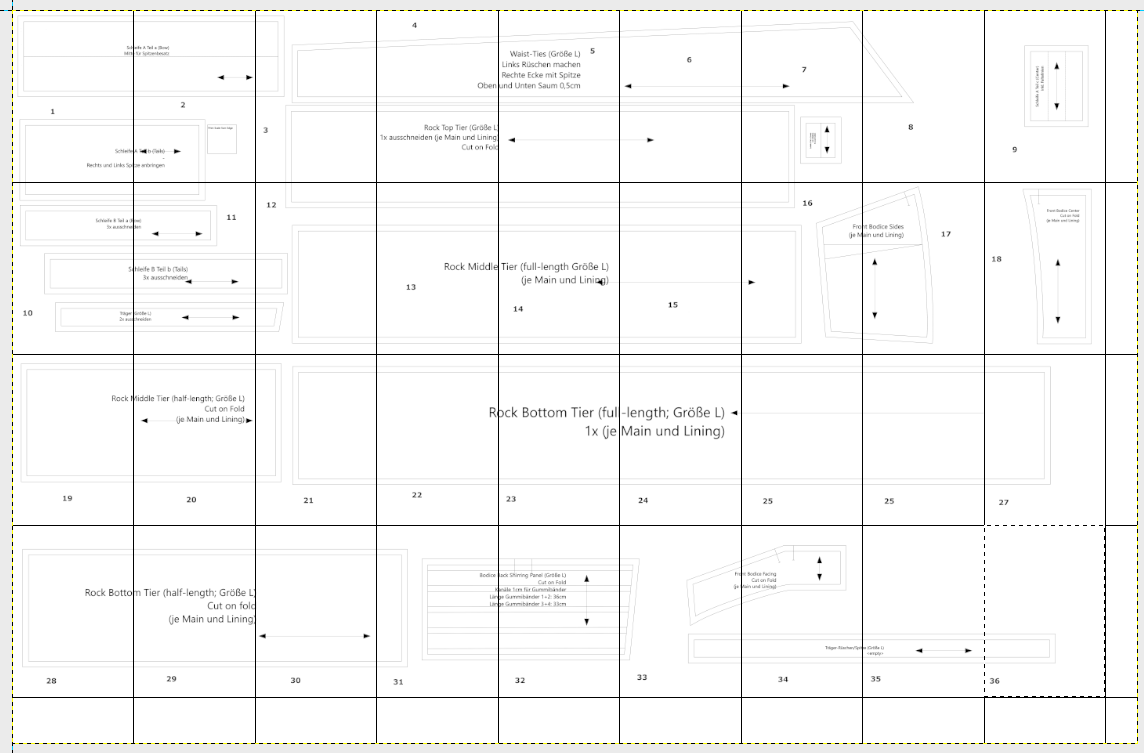
In general it works for what you want it to do I guess. Just the pattern maker is very dissapointing. Atleast you can export the piece-view as a pdf. I did the splitting myself with gimp then… (click to enlarge)
Then my printer decided it wanted to throw a hissy-fit. For whatever reason it first decided to throw an error after 8 pages each time. Checked connections and all, driver was fine. Tried under windows as well same thing. Reinstalled the drivers. Started workimg again but still was erroring. Okay maybe the toner was empty after all it was the one that came with the printer. Well it printed but for whatever reason I can’t check the toner-level.
Oh also linux decided for whatever to not print properly with a scale of 100% the test square was slightly off. Under Windows it was fine though. Still I was very much ready to throw my printer out the window.
Cutting Paper-pattern and fabric
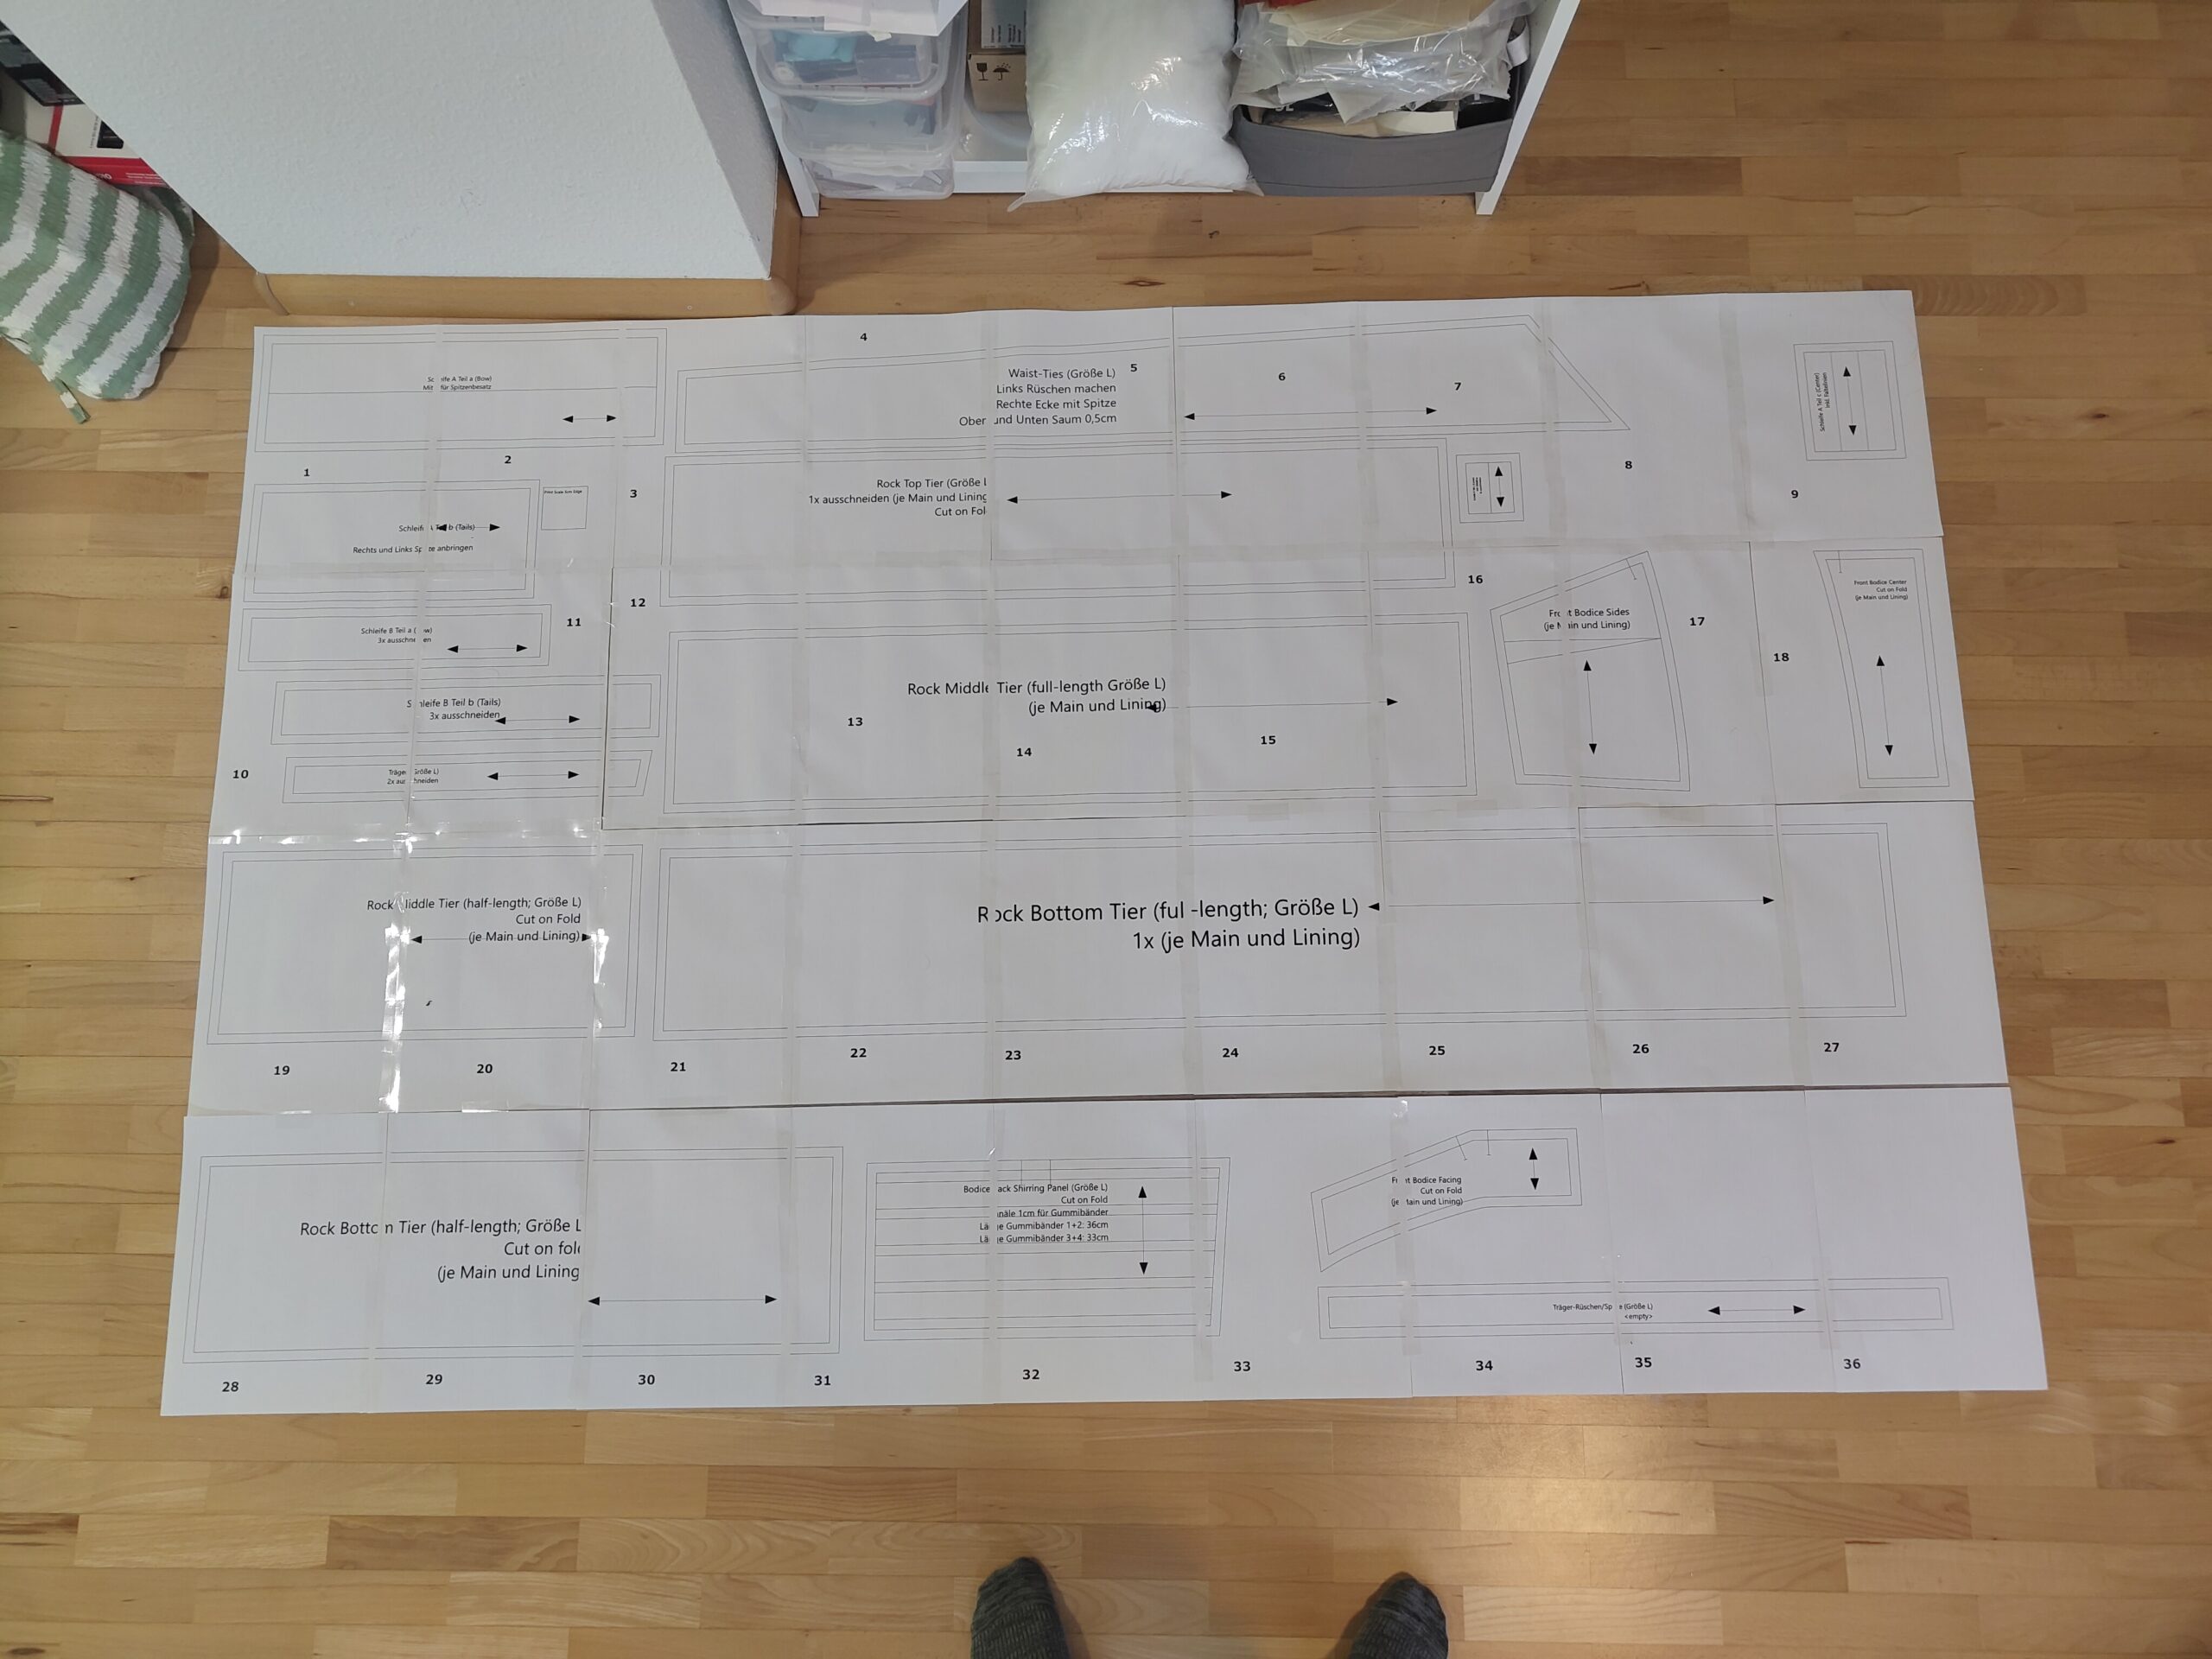
Well after the 36 pages of A4-paper were printed I just had to assemble them. If you printed them properly (original size, no scaling) you can put the pieces directly next to each other (no overlap or gap) and tape them together. (click to enlarge)
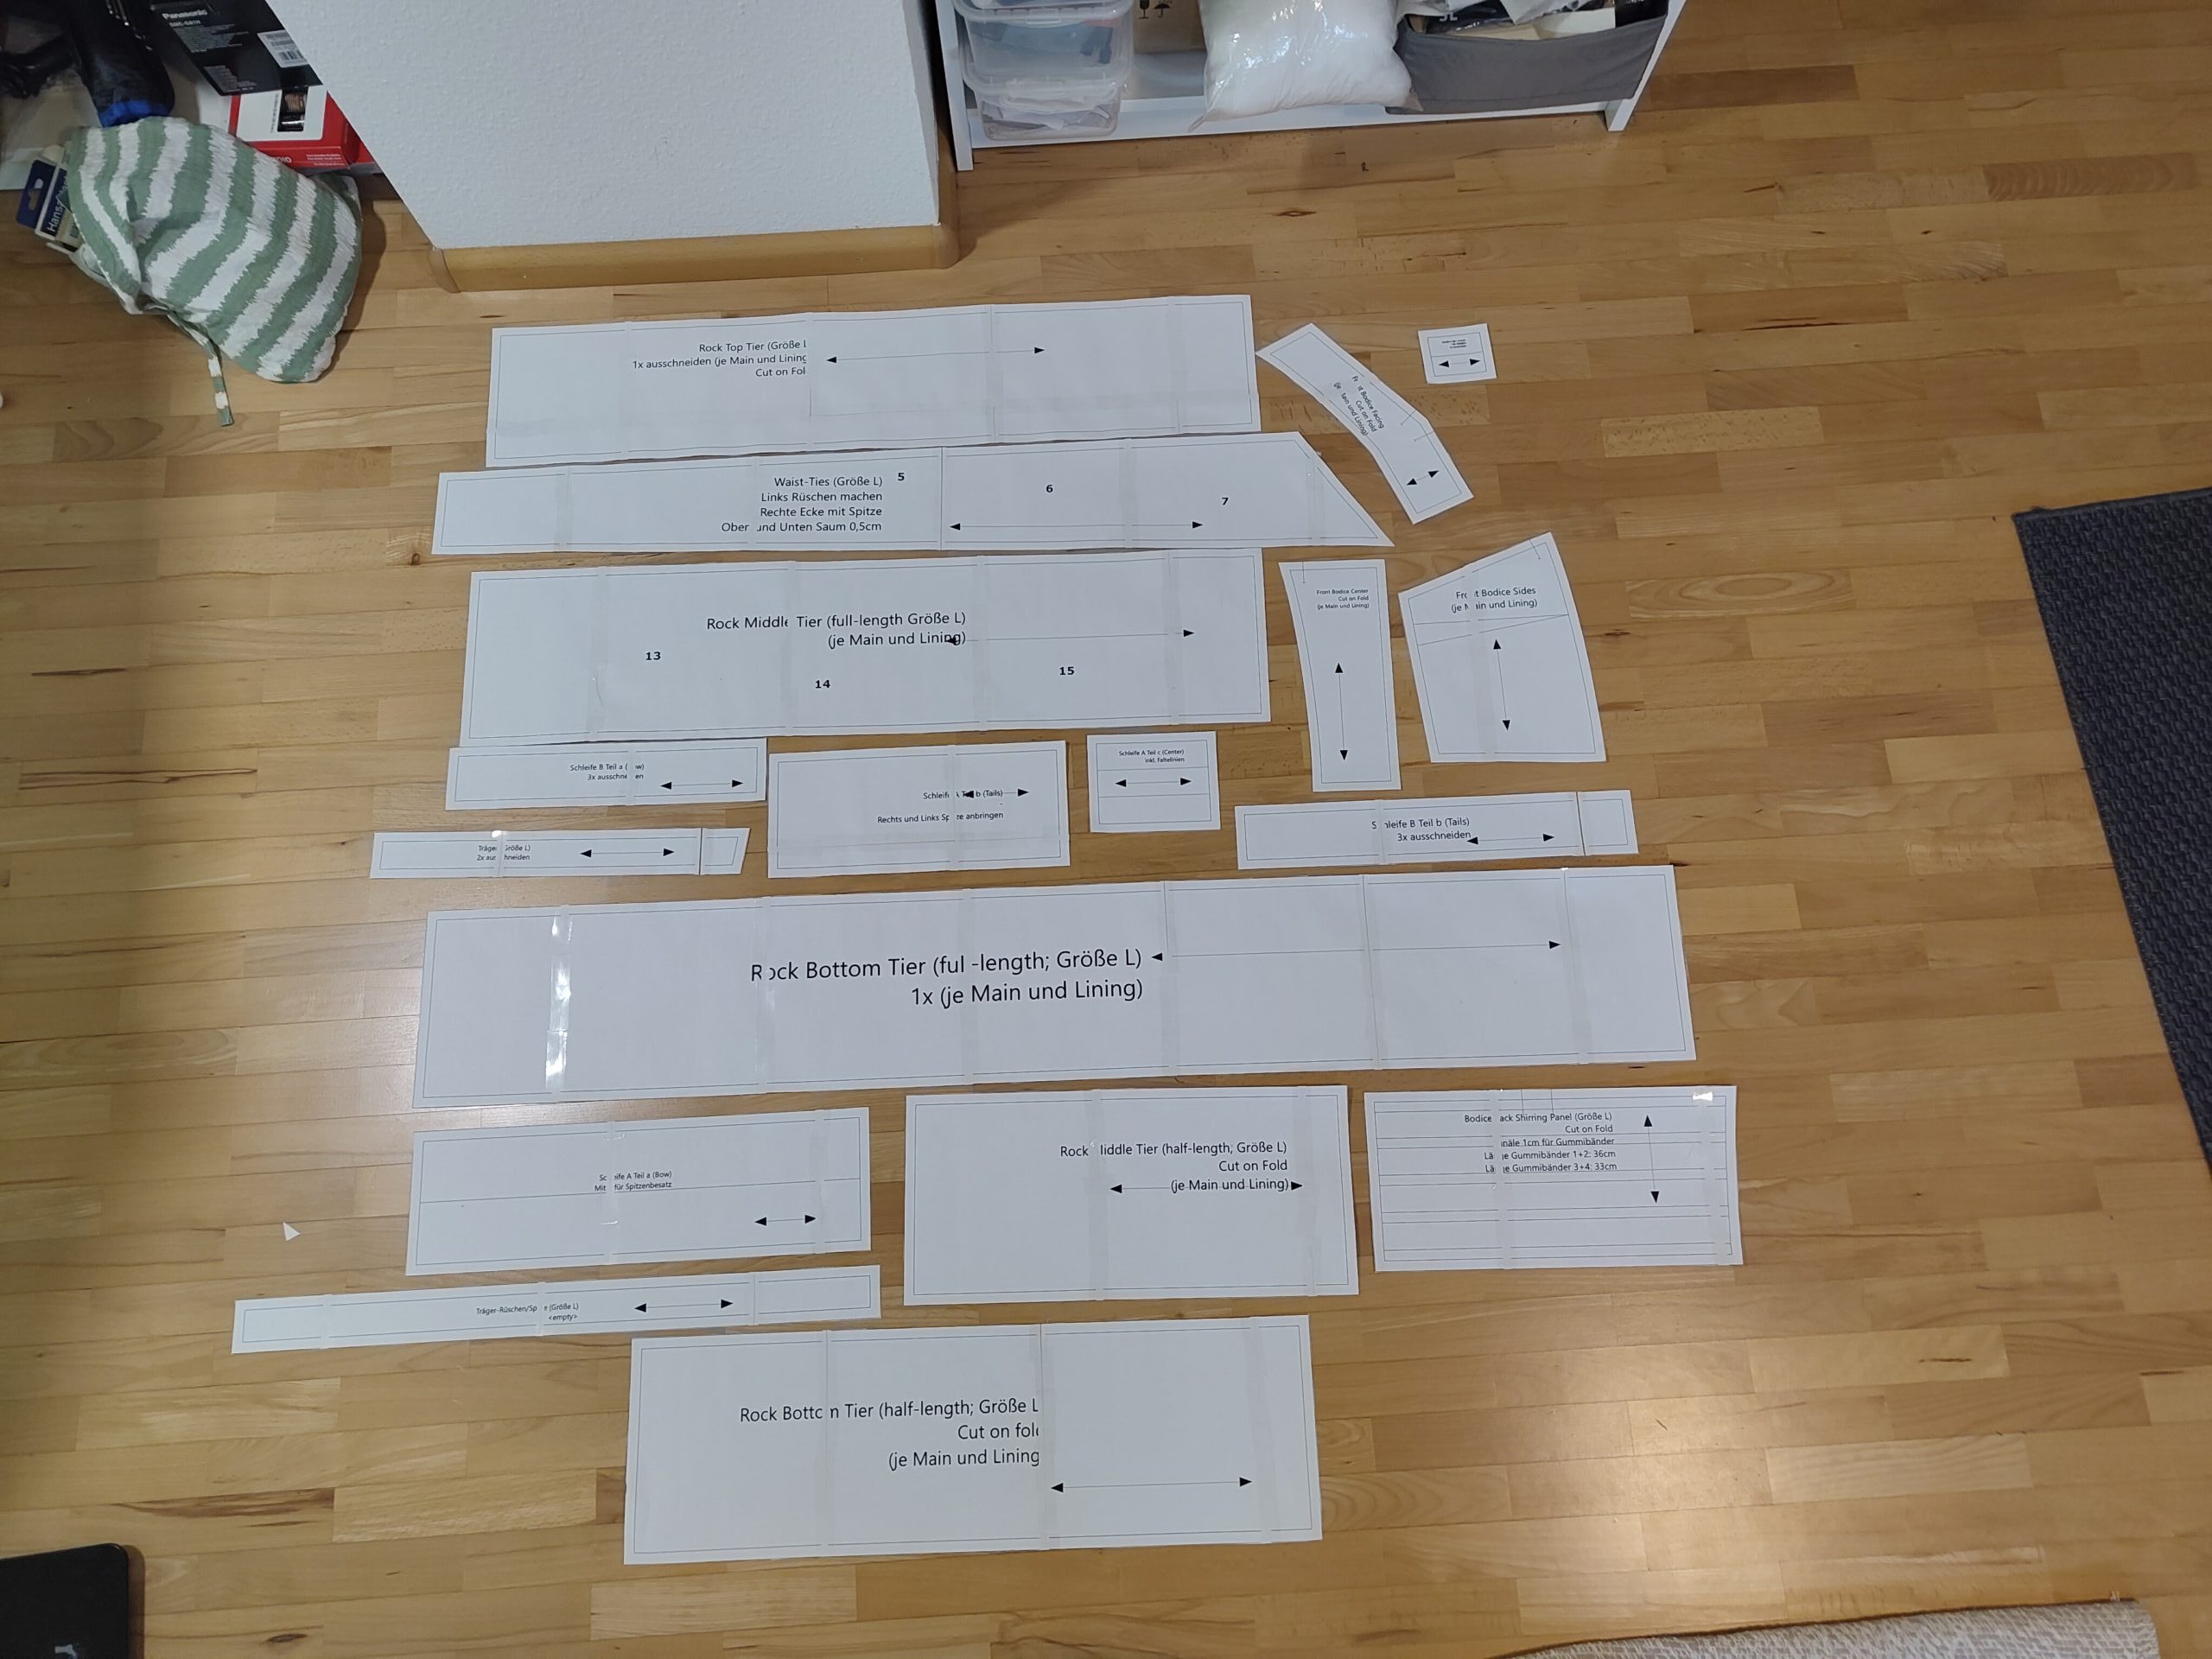
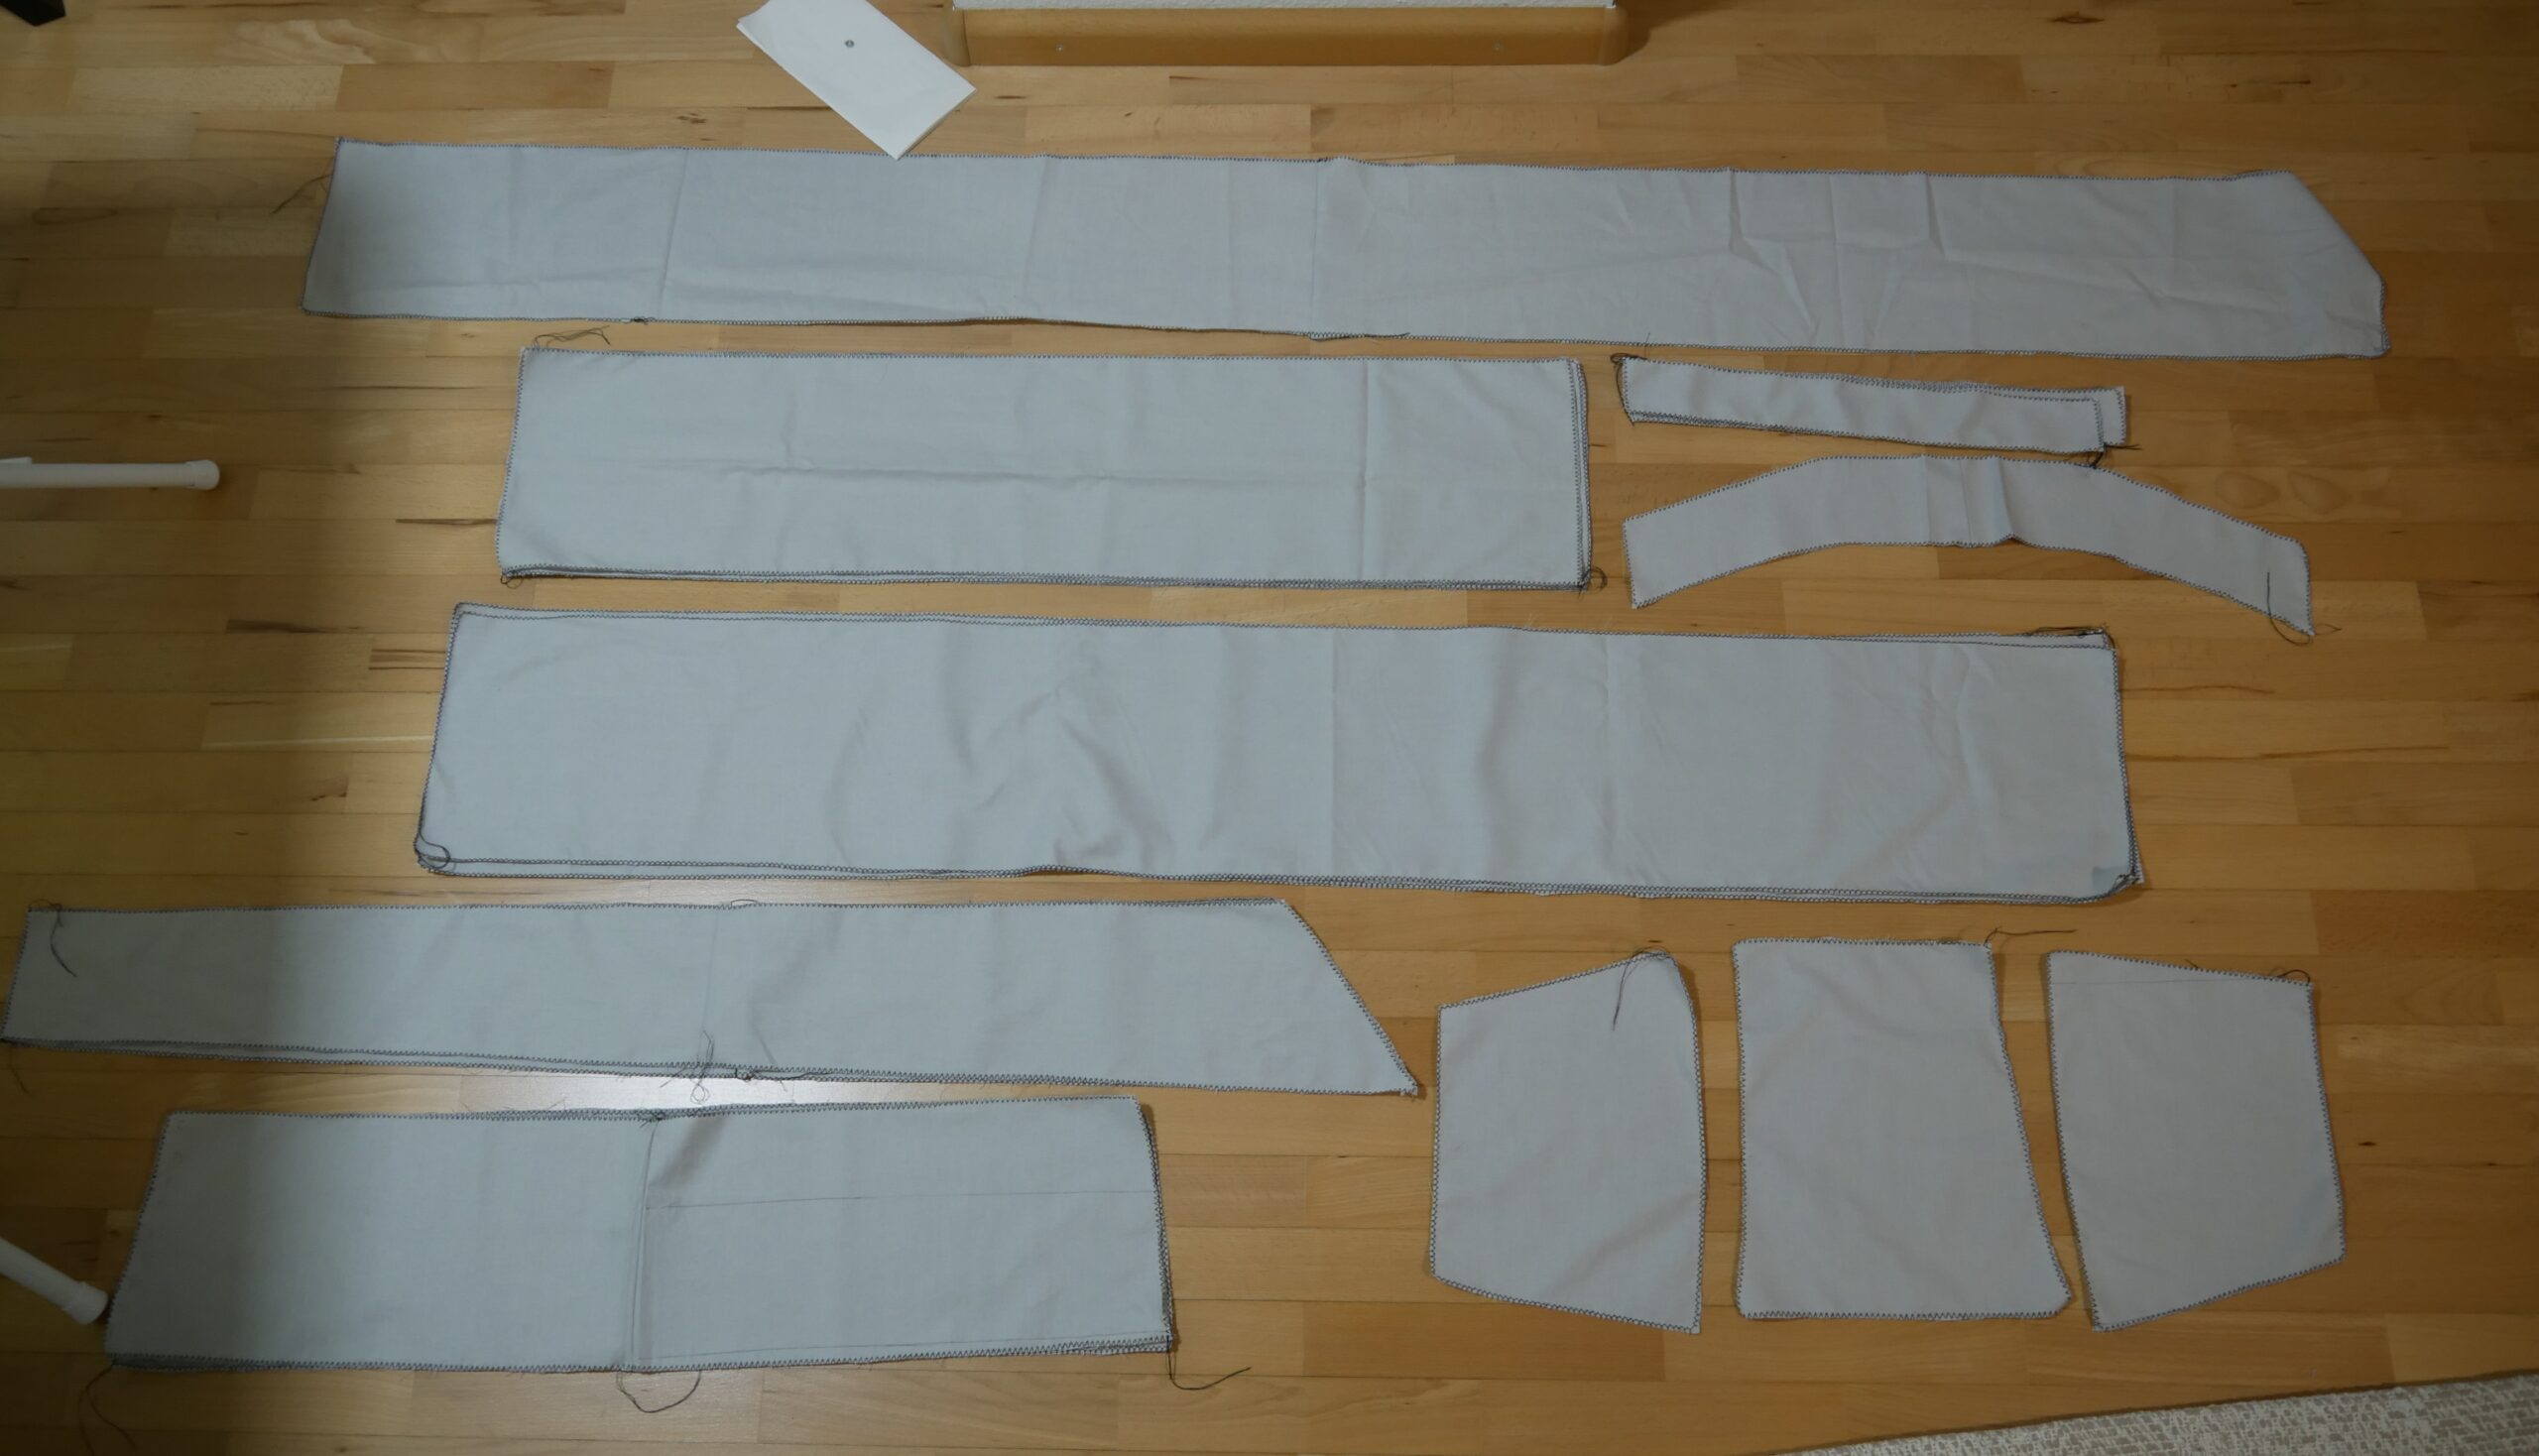
Then you just need to cut out the paper pattern and the fabric with it as well. I did not know at this point in time I had a small mishap with the bodice pieces but anyway. (click to enlarge)
Sewing the Bodice and making adjustments
Now that I had all the parts cut out I could finally begin sewing the stuff together. And I began with the upper part: the bodice. Since I did know will likely have to make some adjustments to it as we go.
The instructions said to the back shirring panel and straps first and then do the front panel. I had my first try like and noticed I did kinda fuck up the pattern. (click to enlarge)
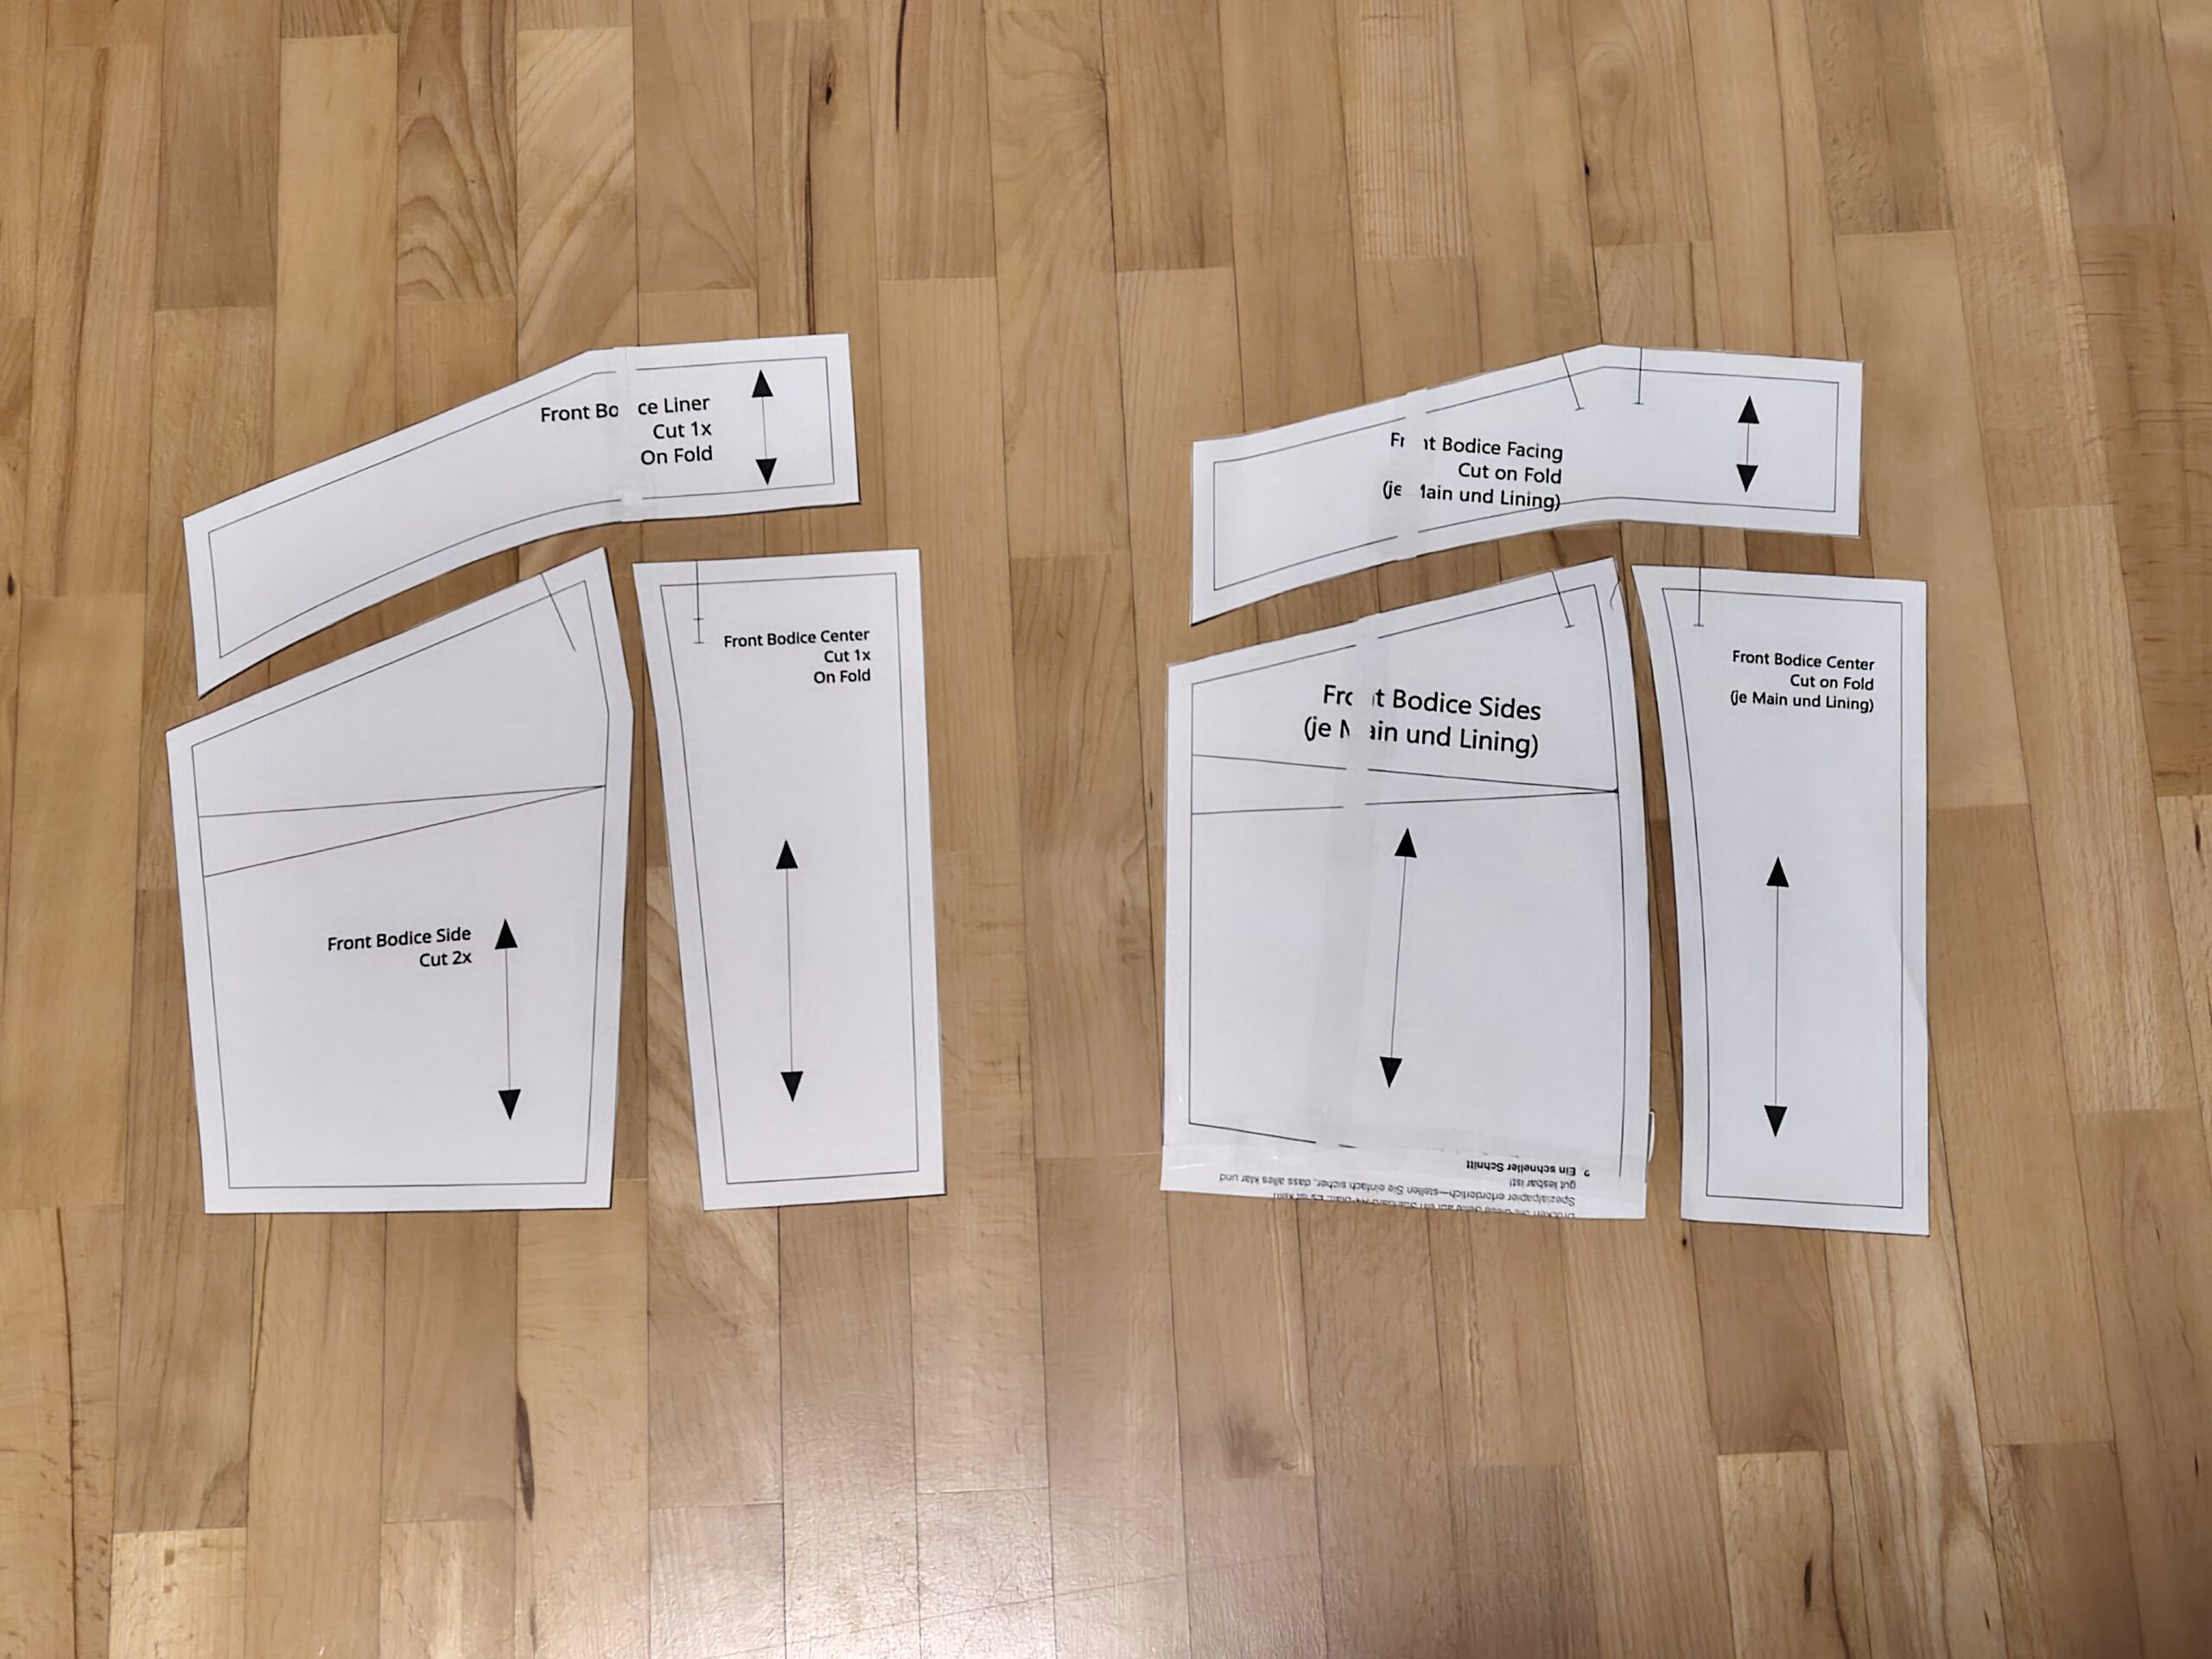
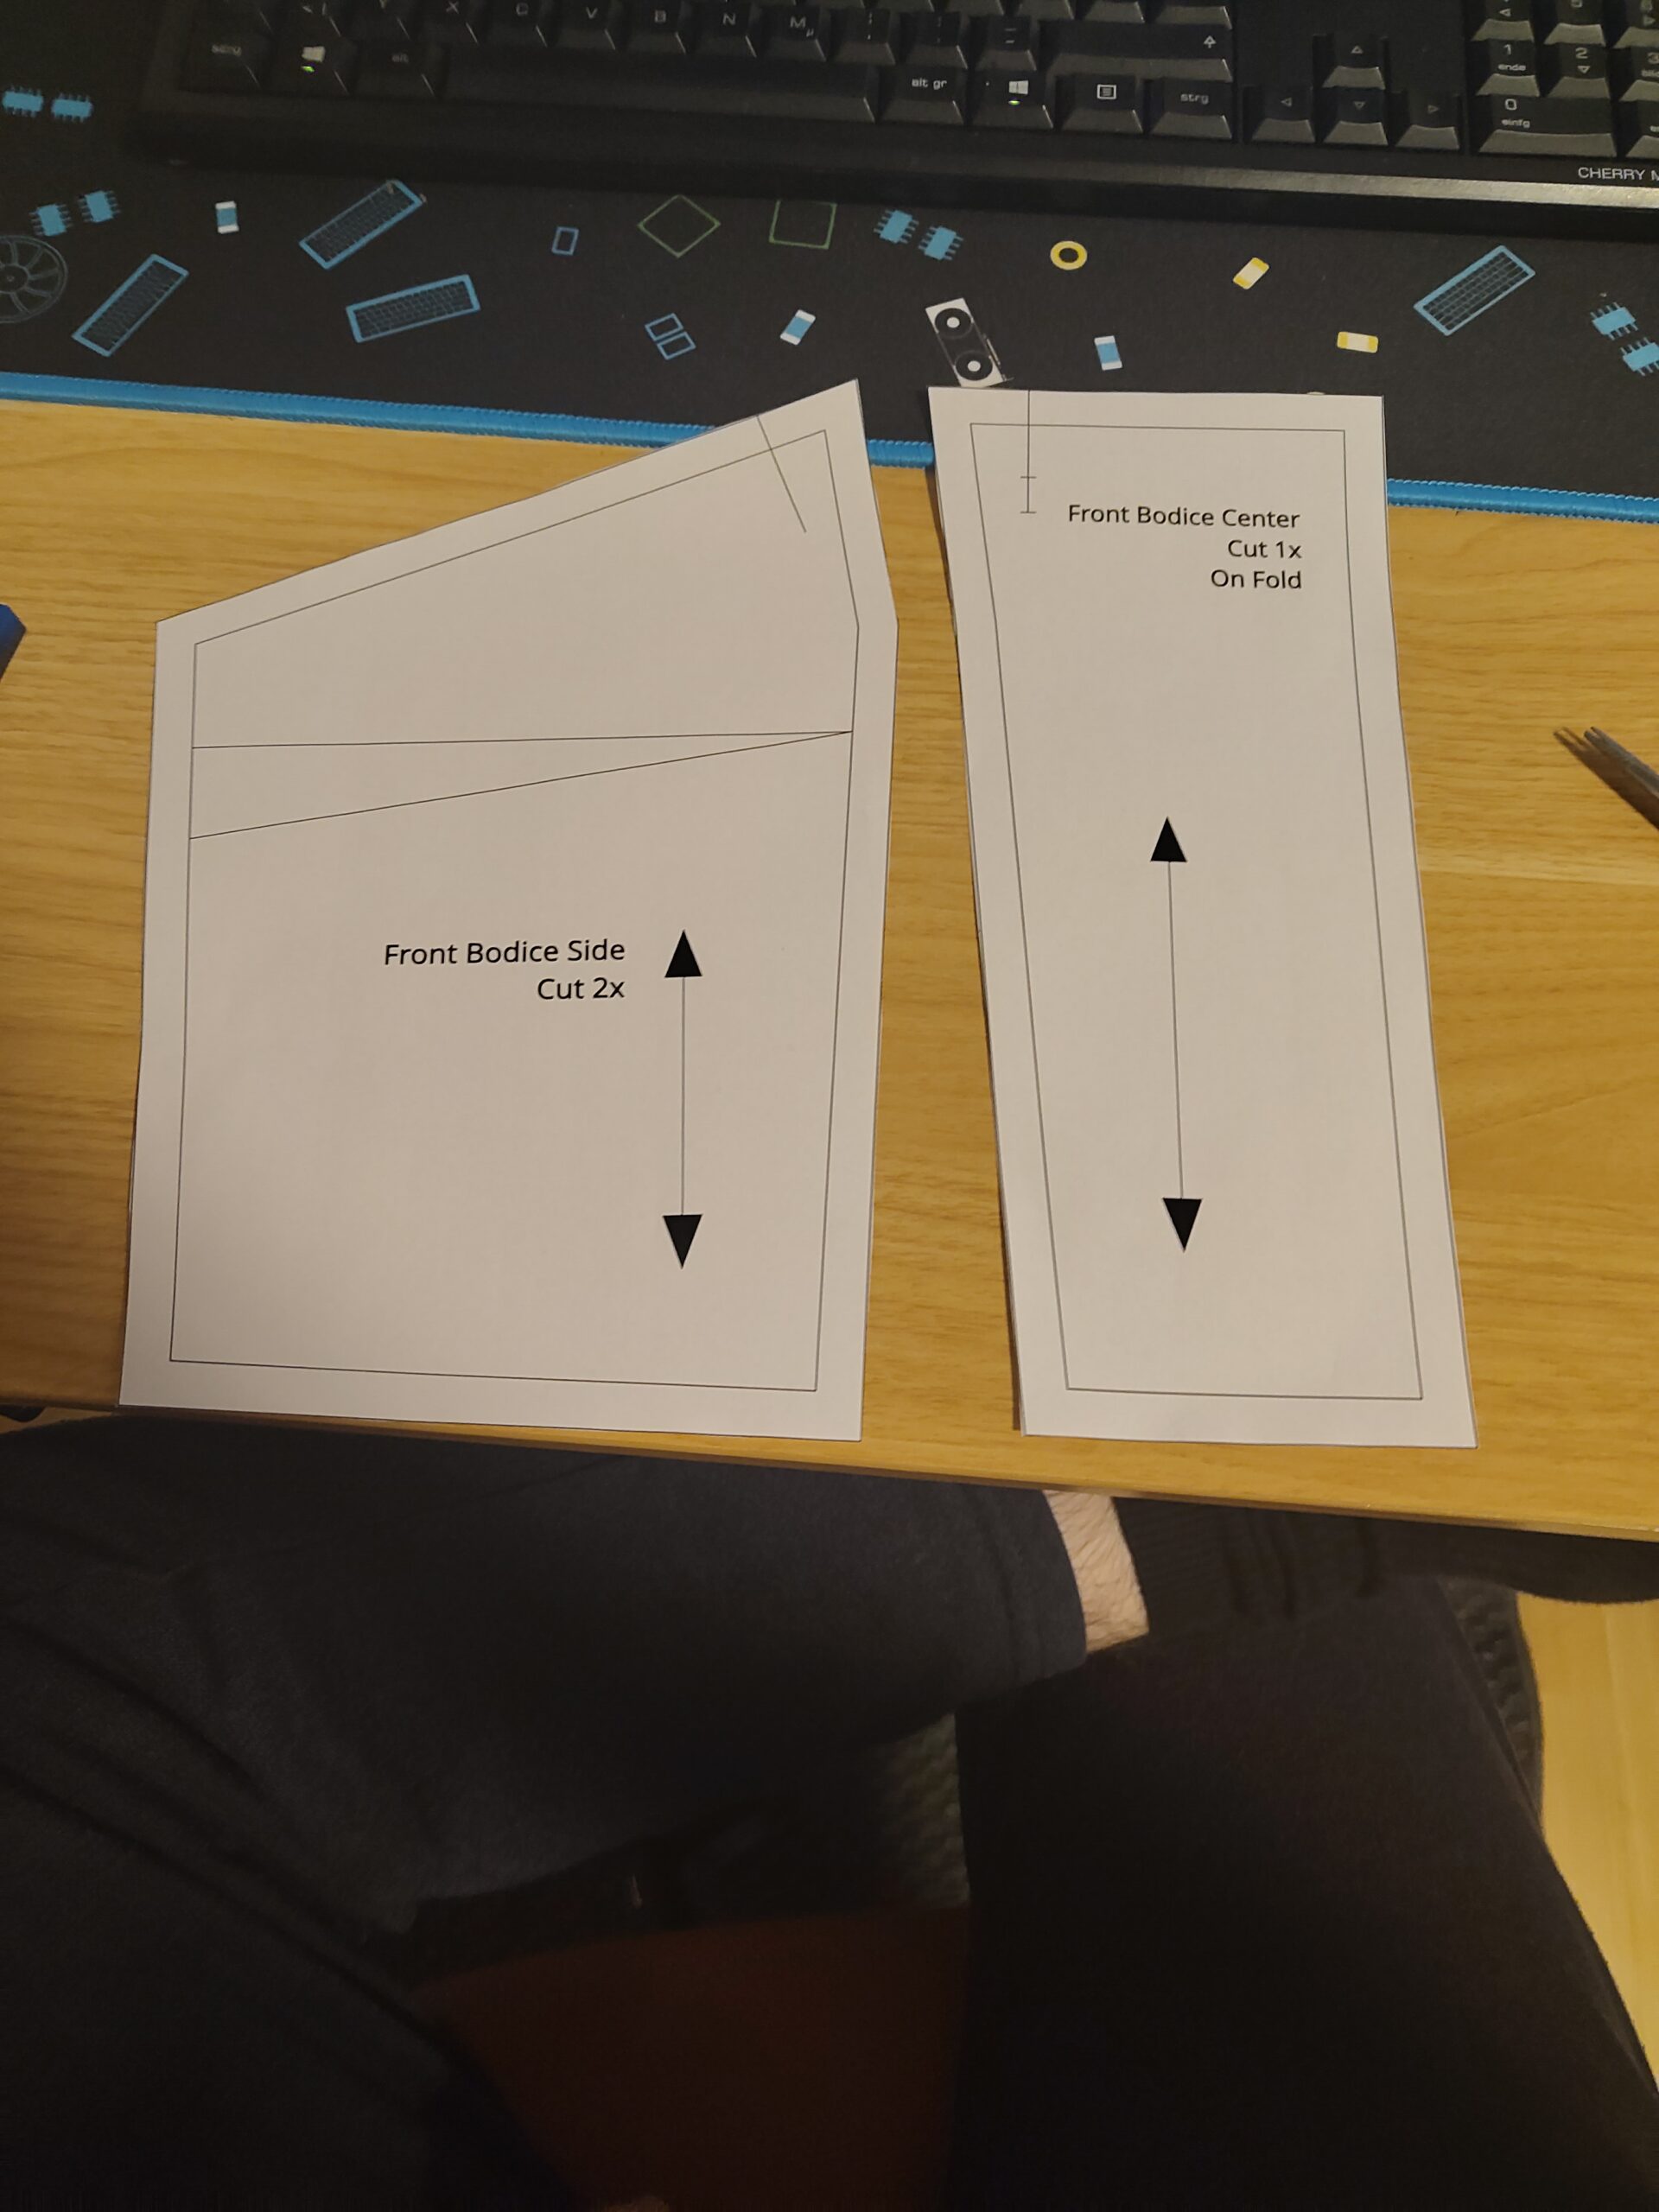
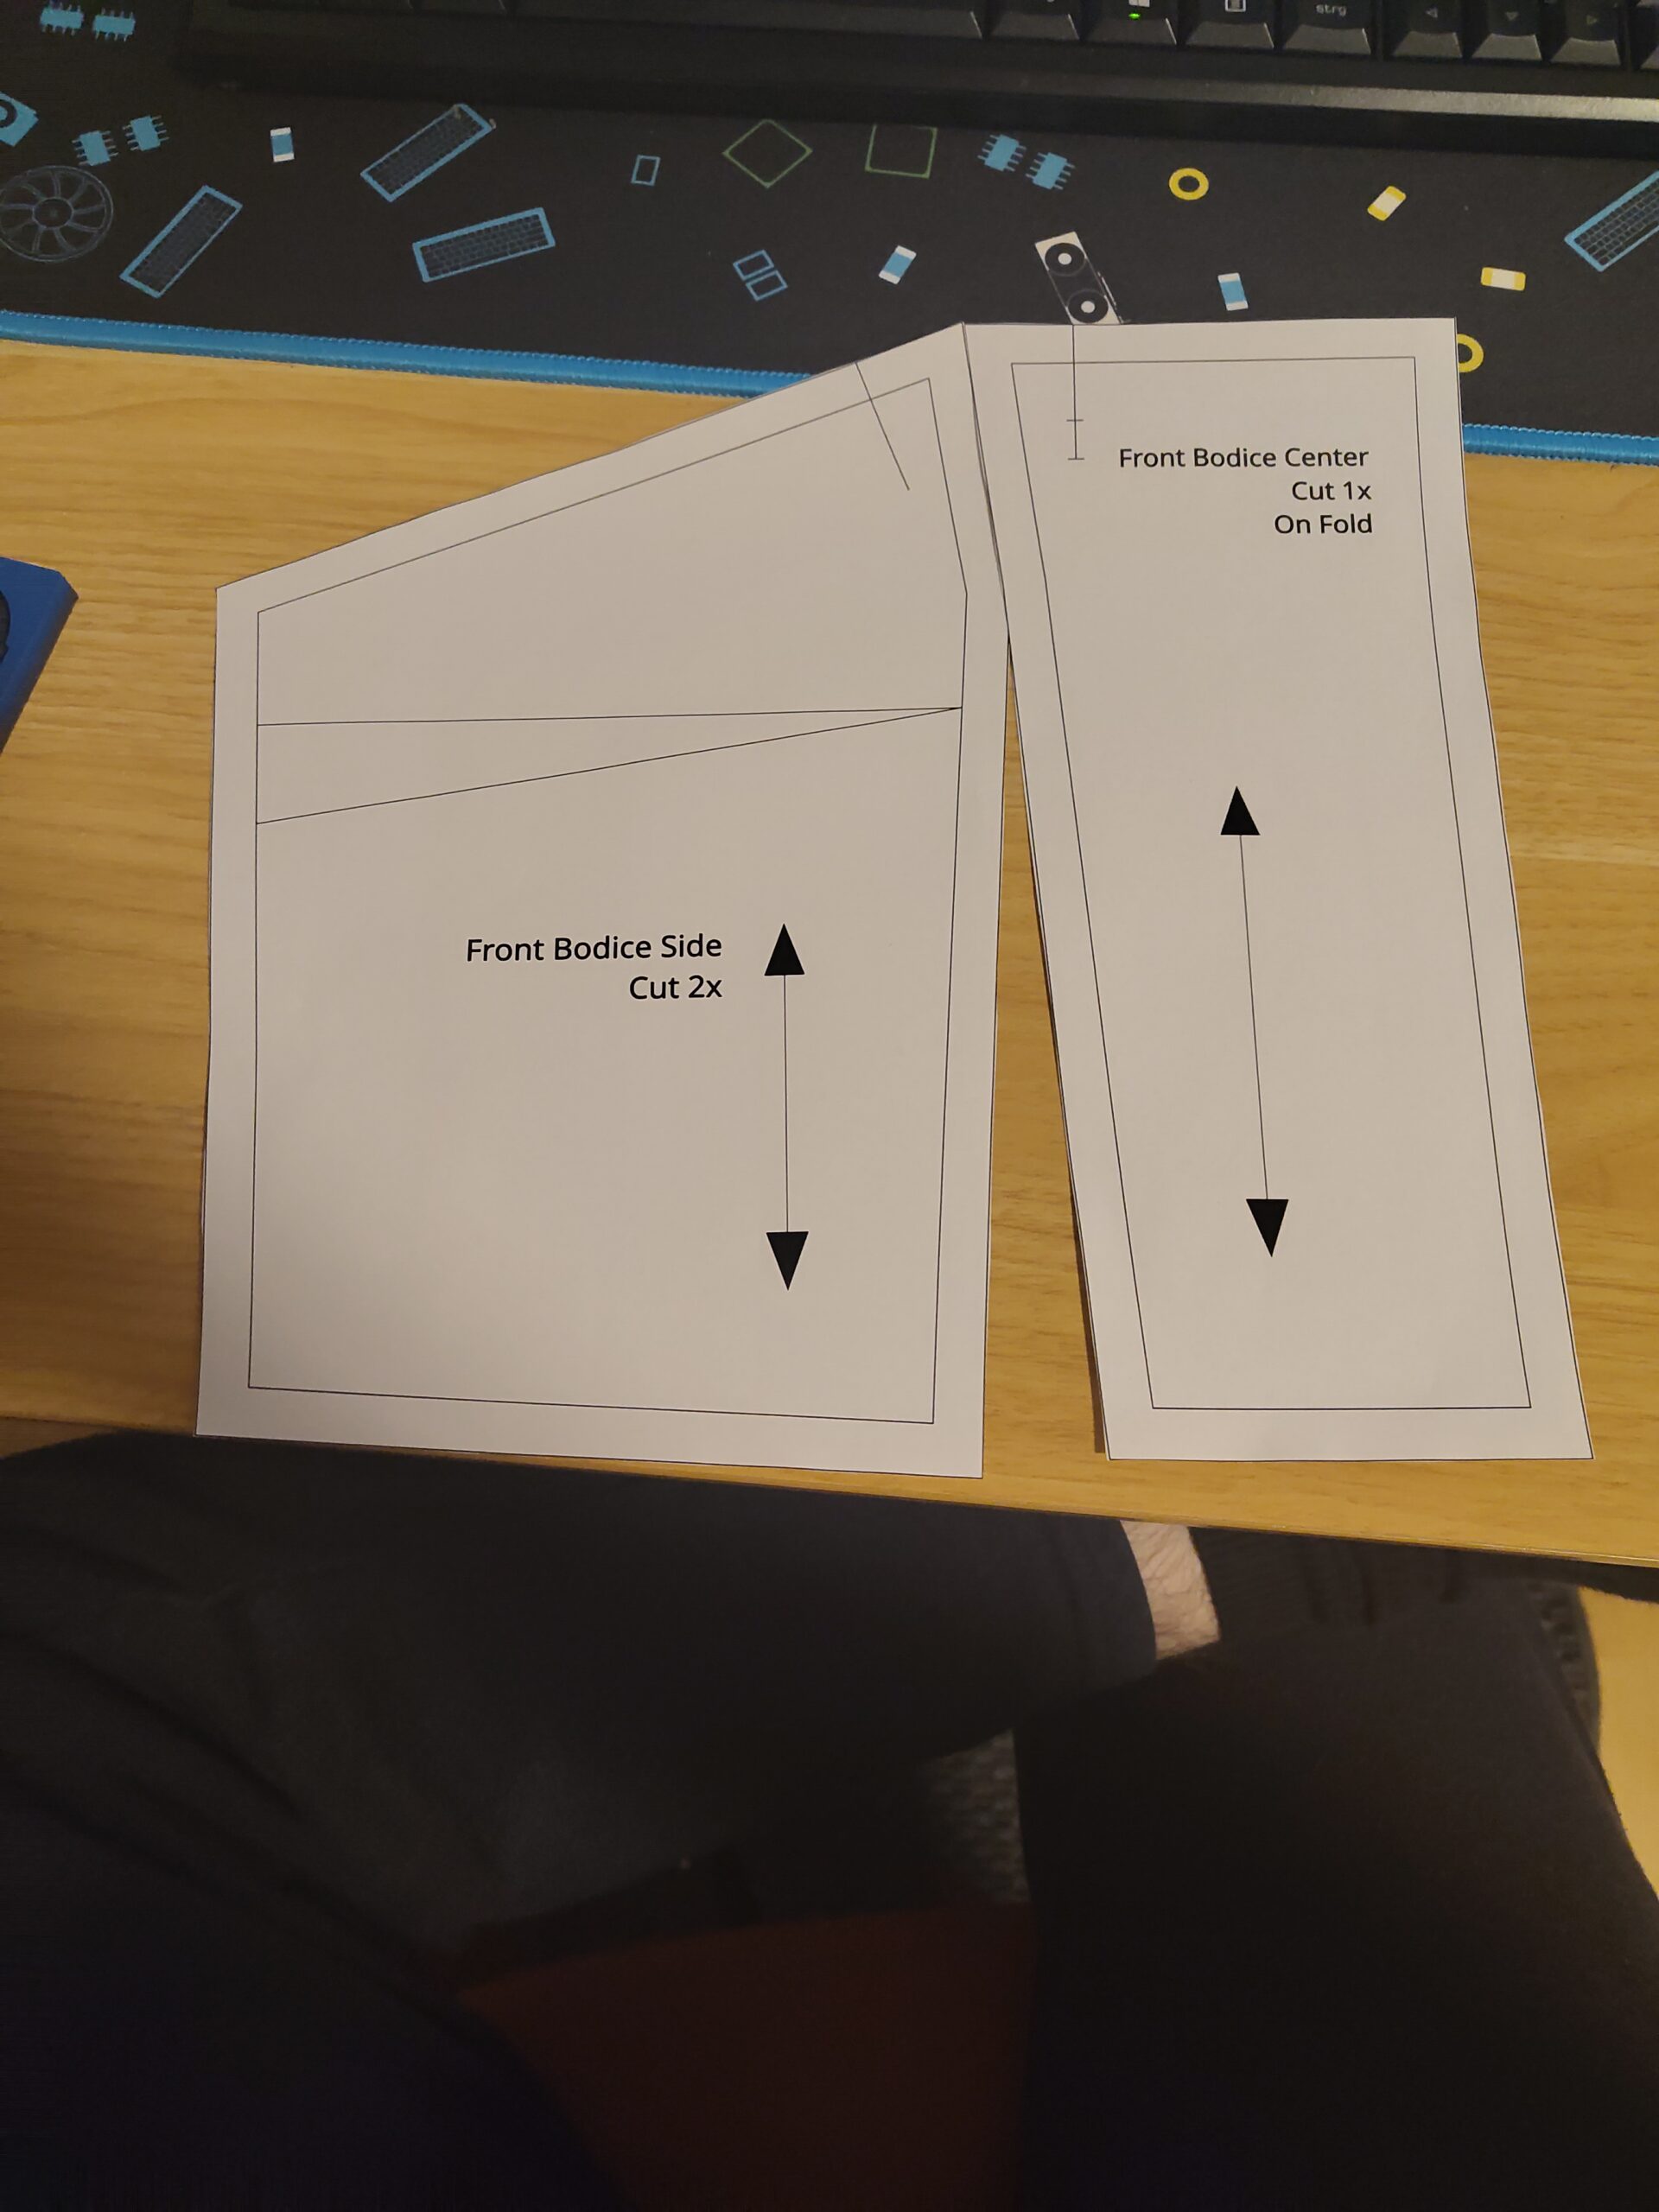
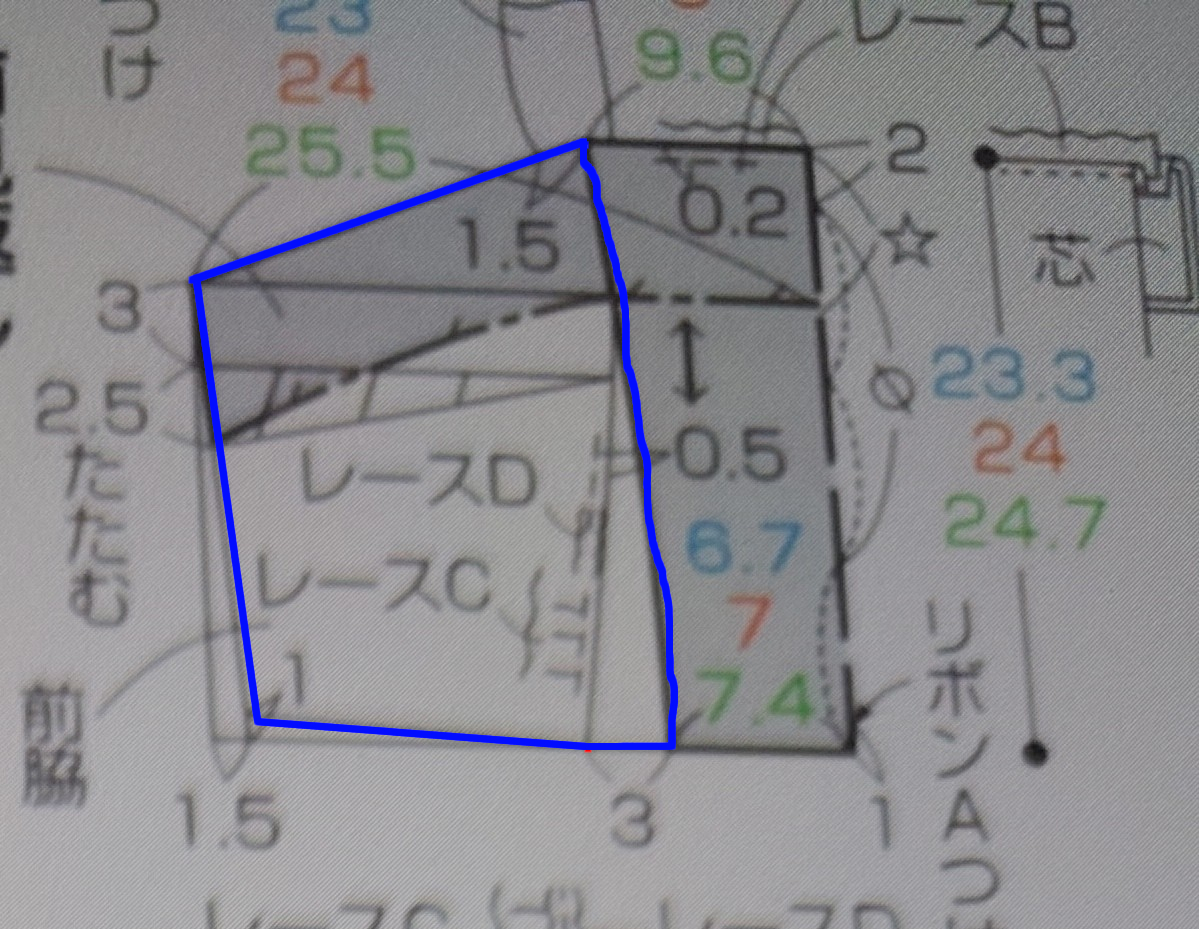
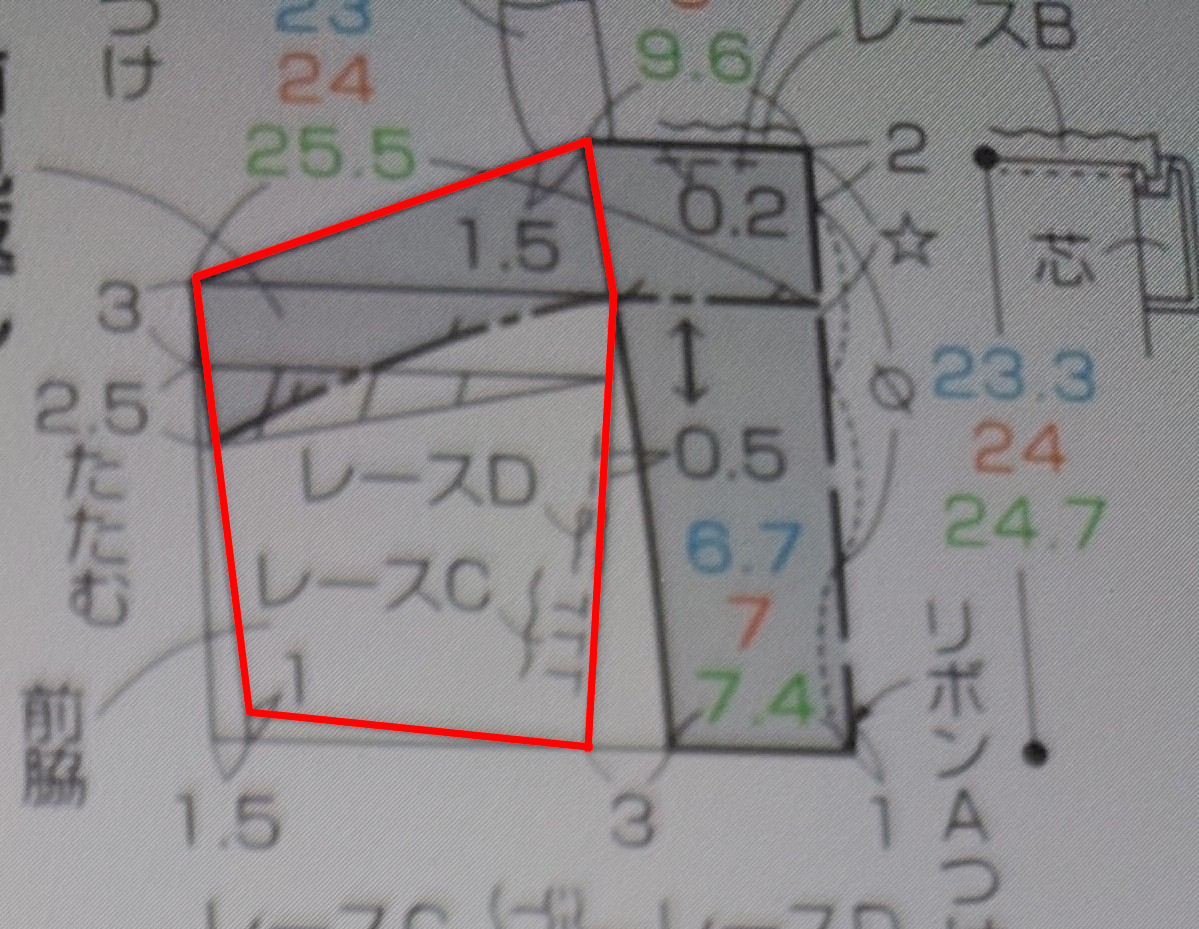
I did follow the wrong line in that pattern block you see above. I did follow the blue instead of the red one and the side-pieces were just not right at all lol. Taking a closer look at the pattern, the magazine and the similar-ish pattern from magazine 20 I finally figured out where I went wrong.
After that was figured out after assembling the bodice for the first time I had to make a new front part which looked quite nice for sure. I will show you the result soon.
First let me show you the back shirring panel or rather how its made. 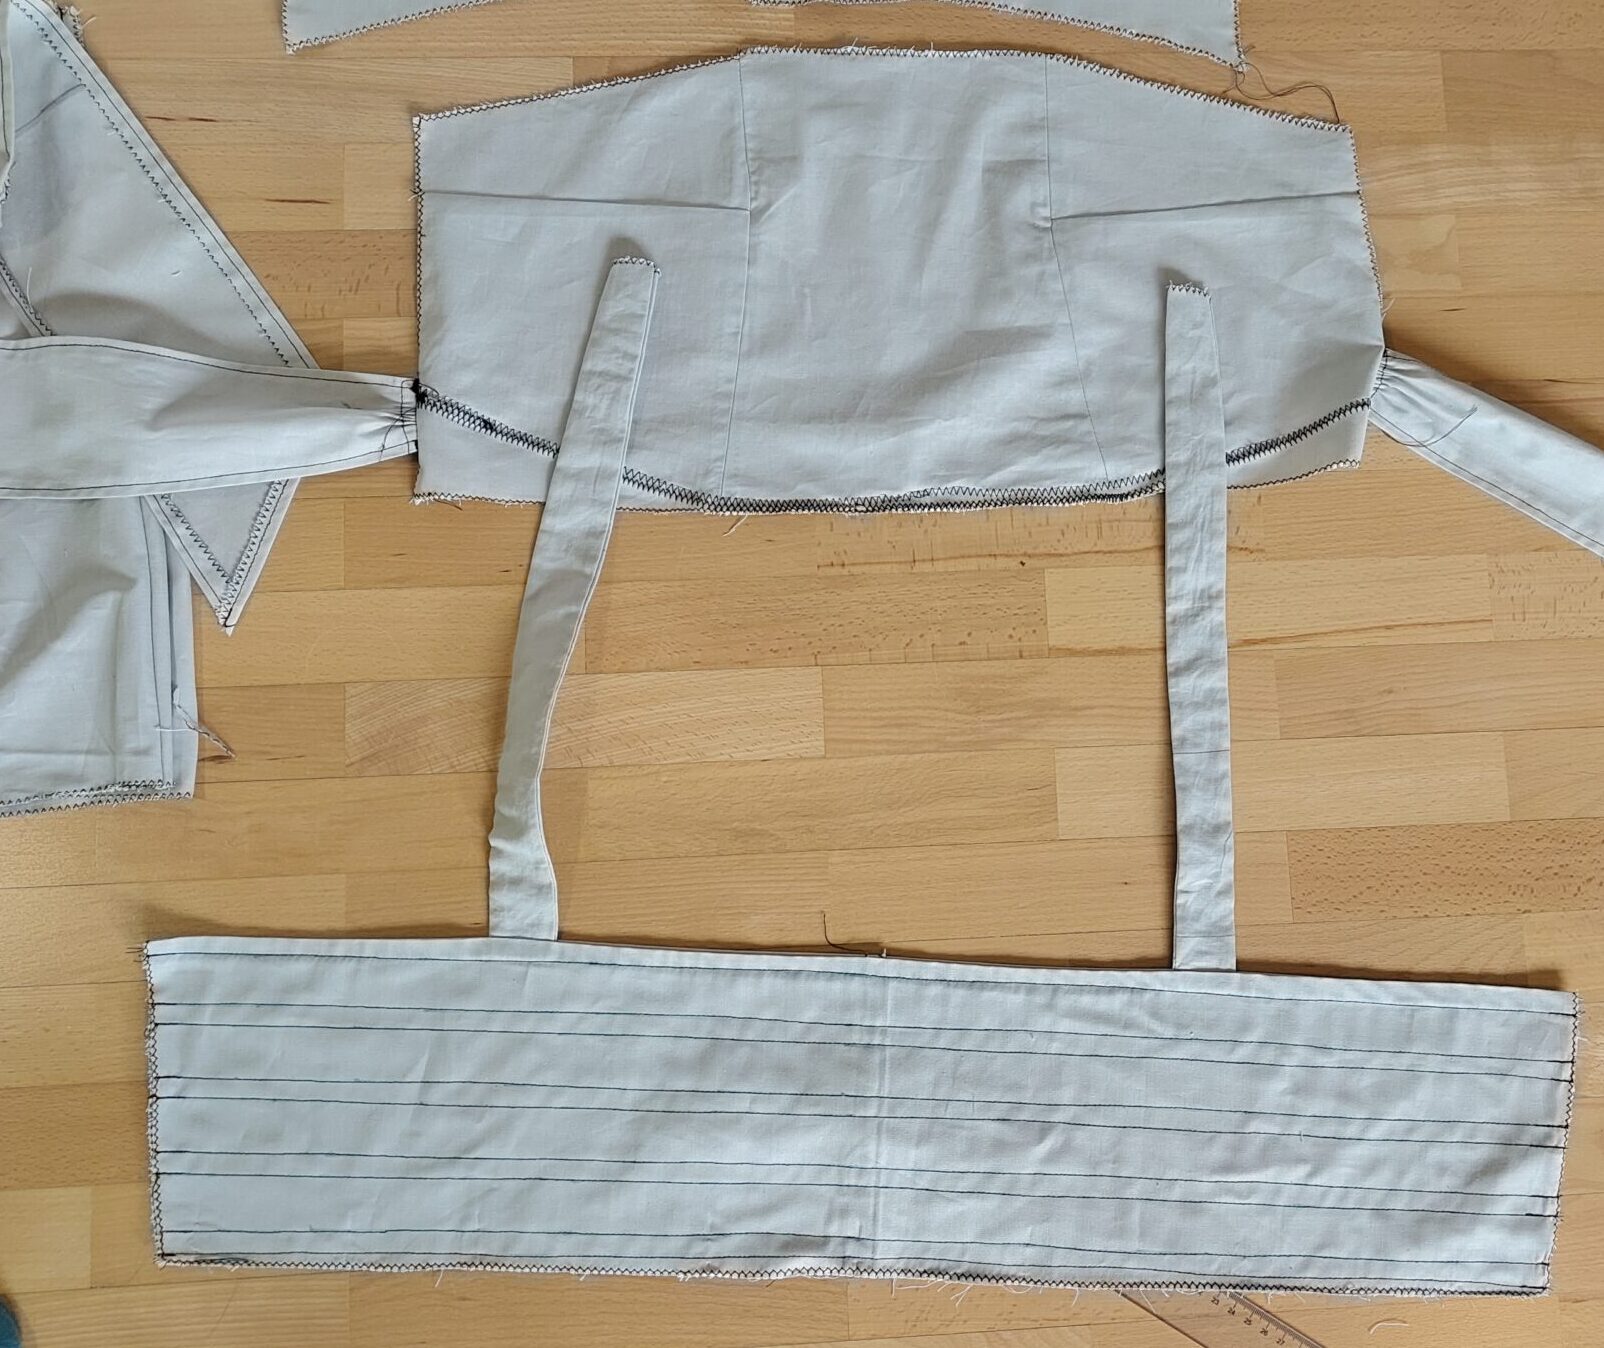
The Shirring panel (bottom panel on the pic with all the lines and the straps attached) used channels for its elastics. So basically you take the panels and sew paralell lines which are about 1cm apart, leave some space and add more channels like this. Then you cut your elastic (narrower than the tunnels I used 7mm) and feed it through the channels using a safety pin on both ends. Once the elastic is through sew in place on both sides.
Let me tell you this is so satisfiying to make even as I did make a small error. I should have sewn on the elastic a bit more inside the channel outside the seam allowance to make assembly of the bodice easier. But oh well. Also I did one to few elastic as well as you will see later. I just was not sure if I would have enough seam allowance left to attach the skirt part. Turns out I did. So I will add the missing elastic later.
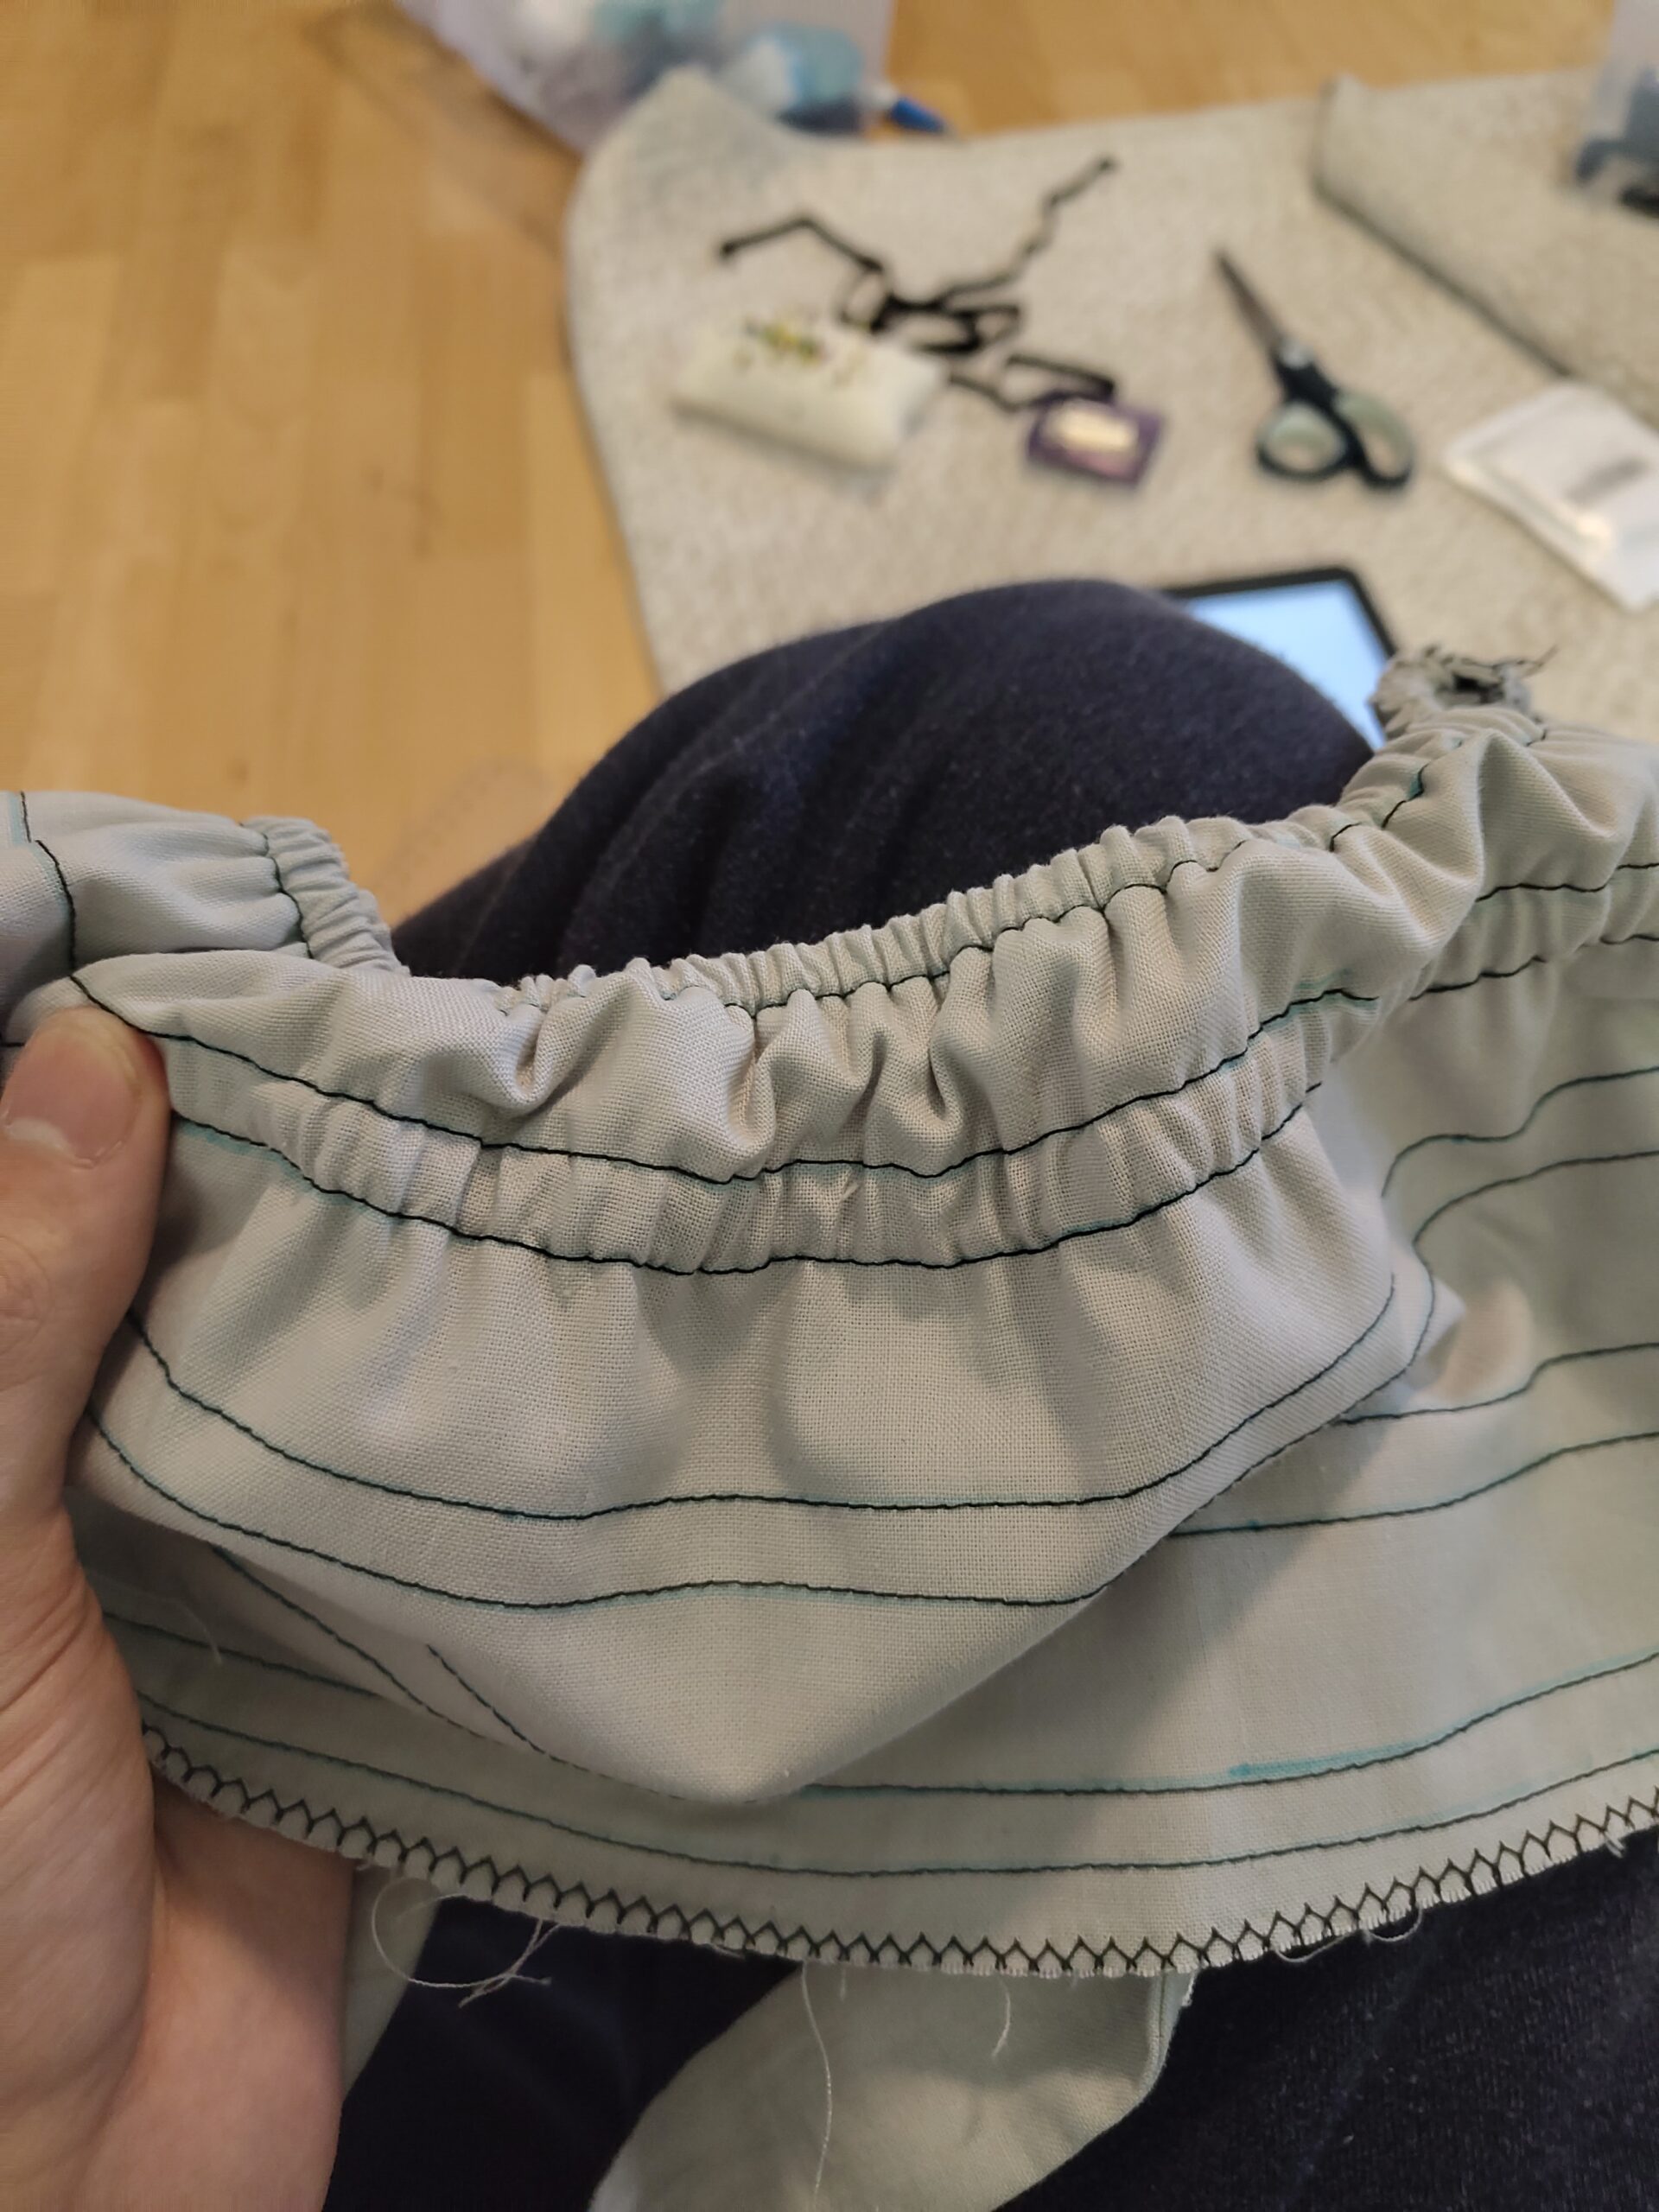
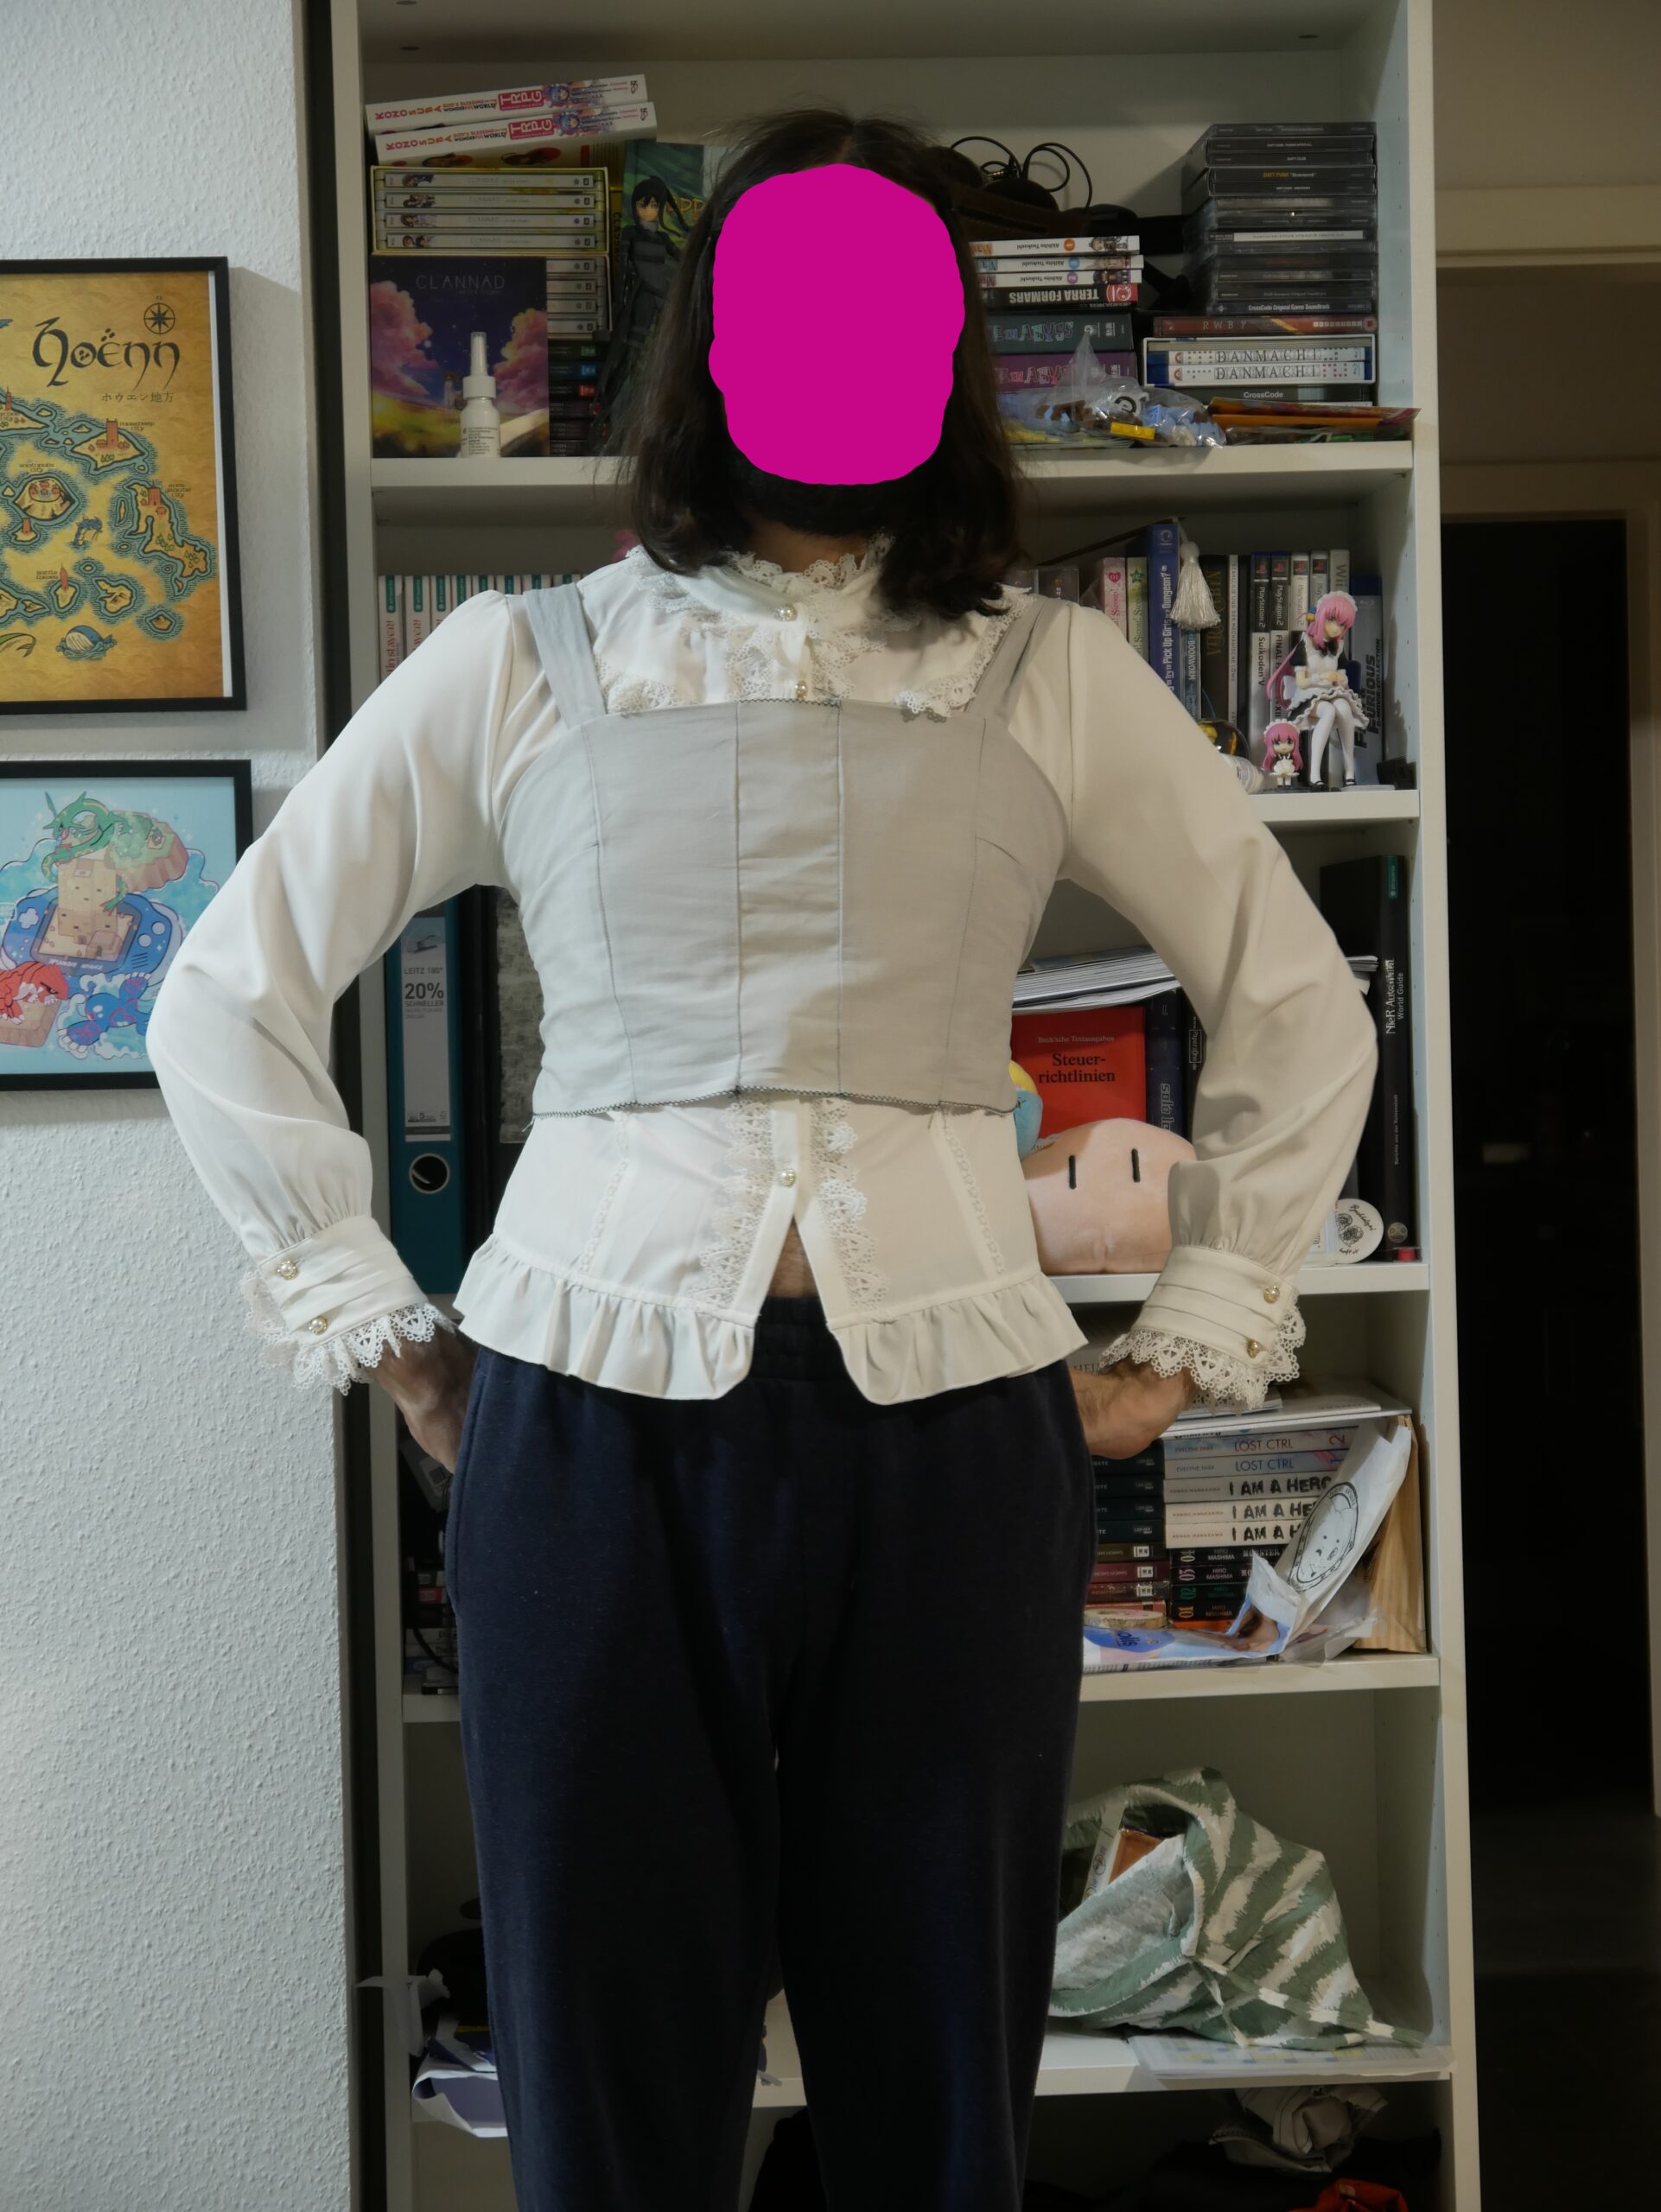
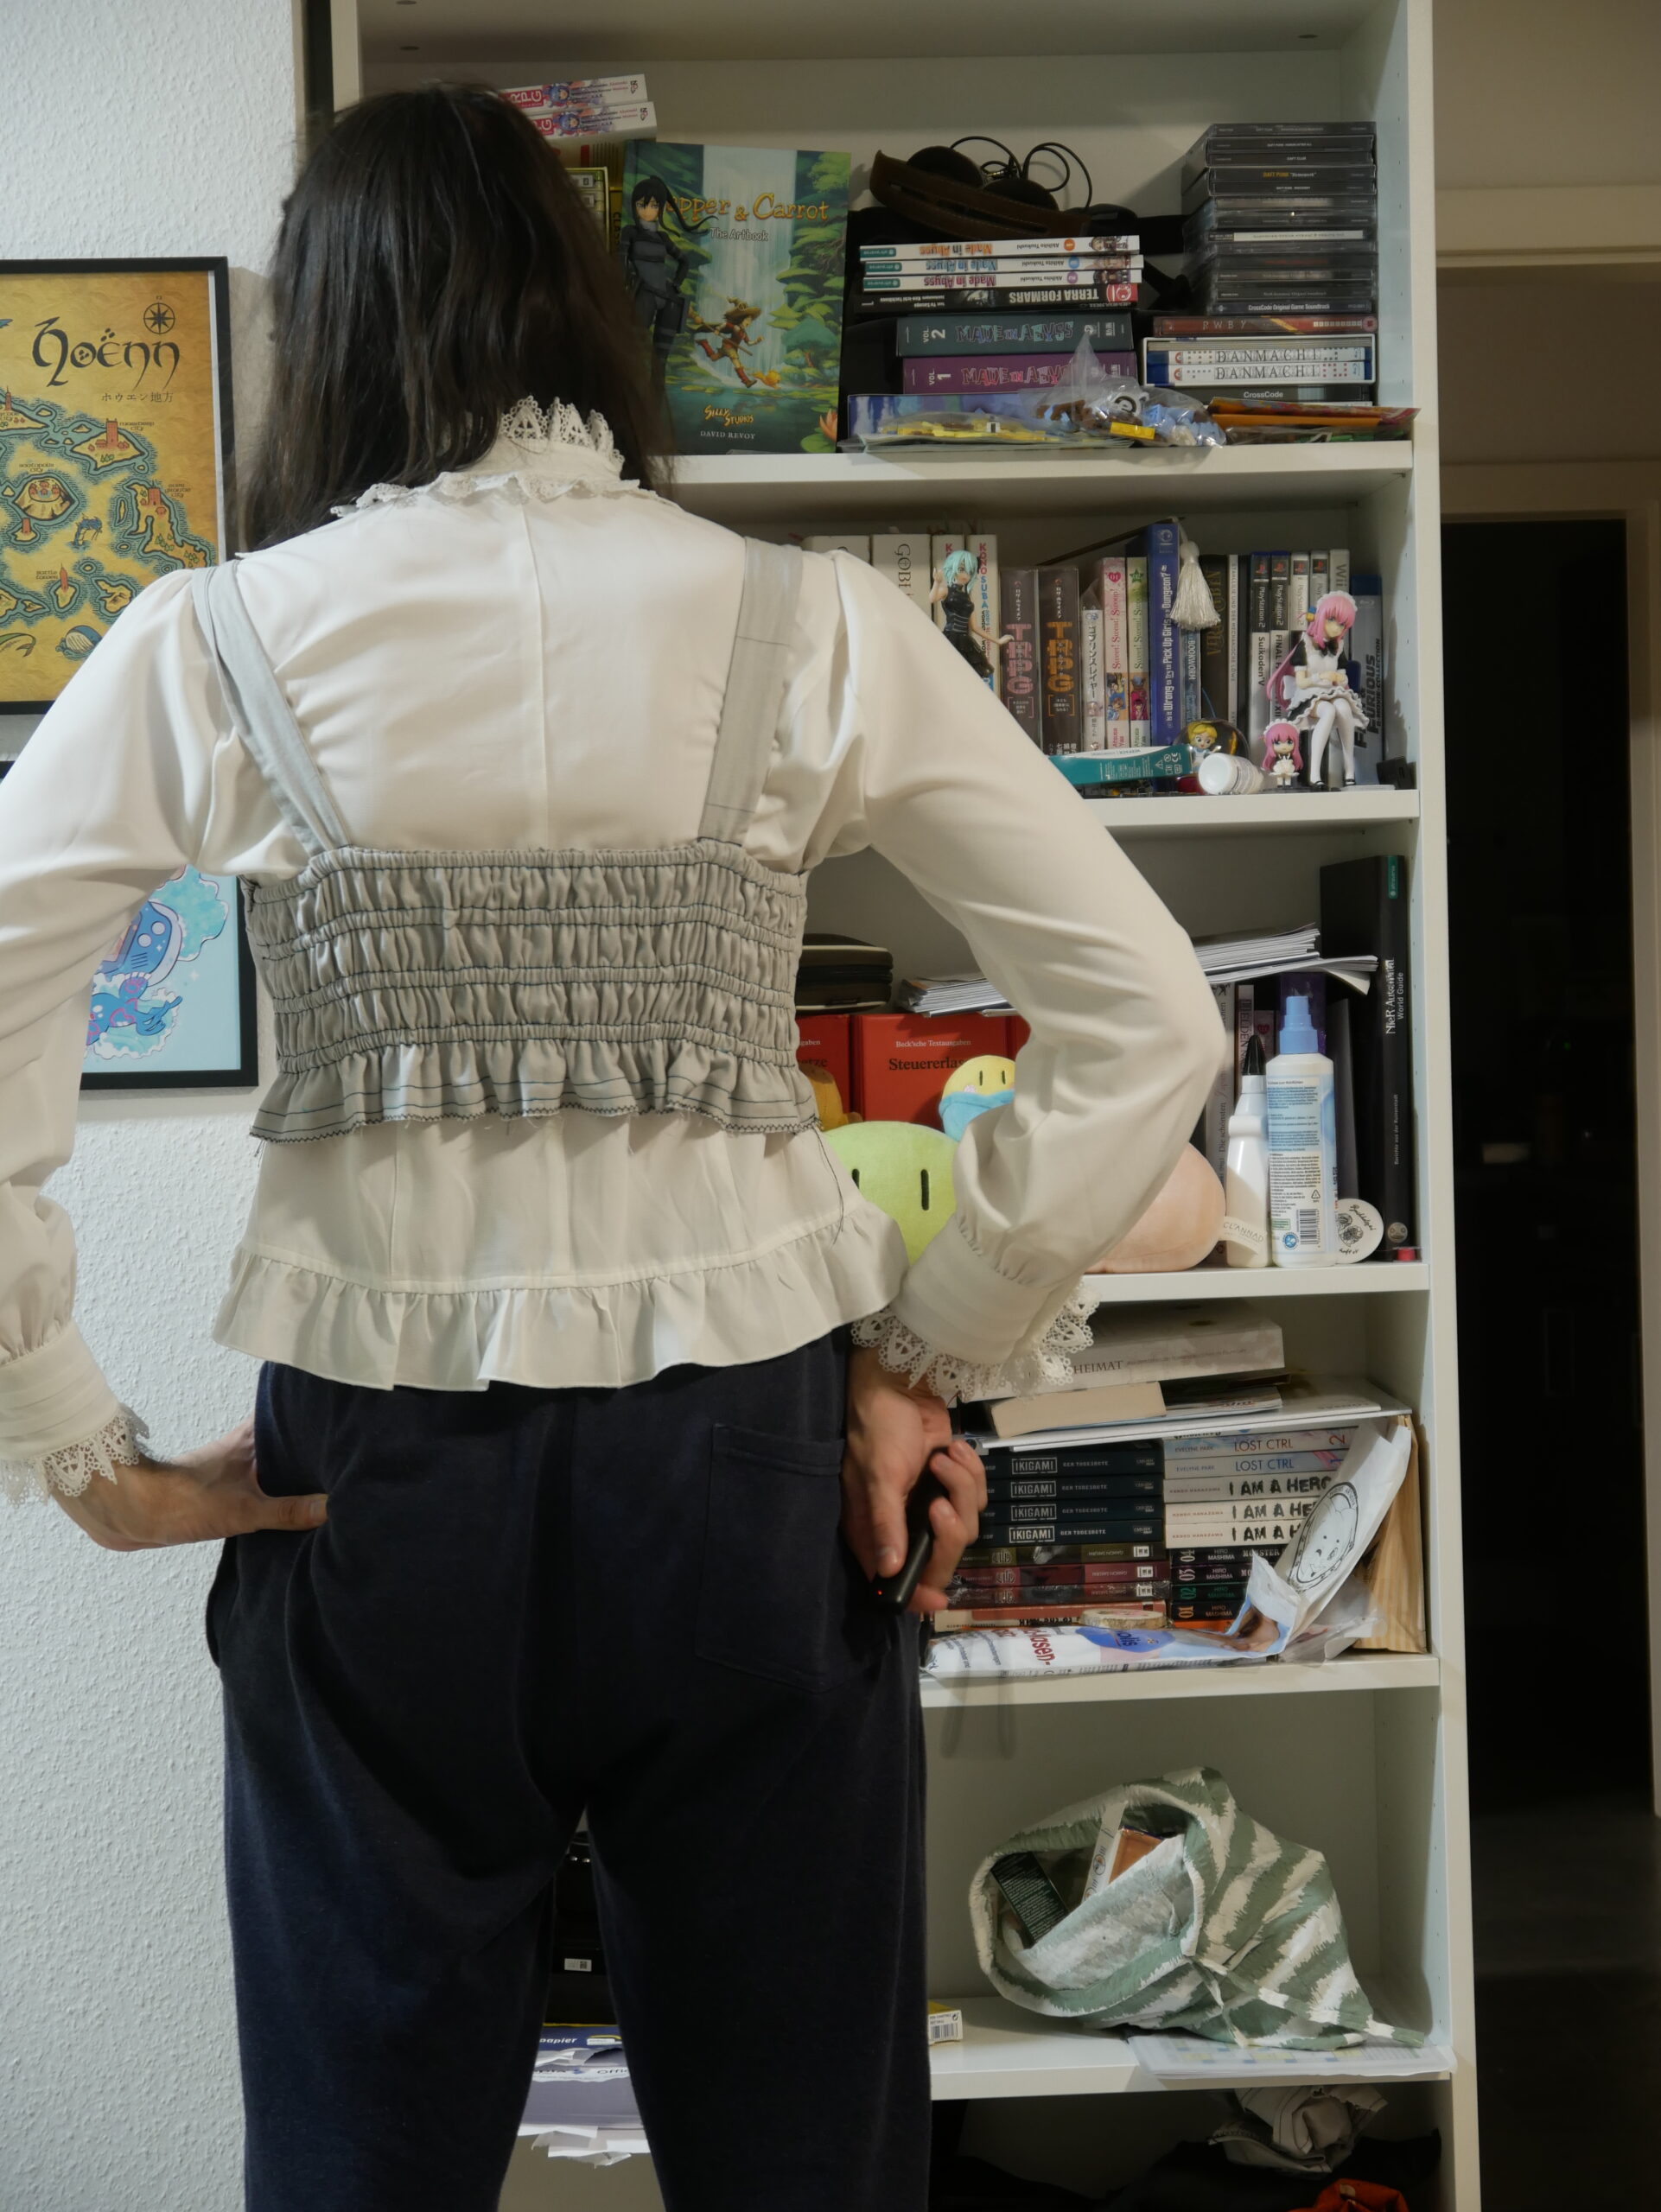
So here are some images of the somewhat finished bodice. Note here I did add a widening of 6cm at the front just too see what measurements I would need. I was really satisfied with the wider panel. I also did lengthen the straps later on as well so the JSK would sit at my natural waist. (click to enlarge)
Making the Skirt and attaching it to the bodice
Sorry not too many pics for this part as I just wanted to get it done yesterday and zoomed through making the skirt to see the fit. A rectangle skirt even with tiers is fairly basic.
Sew together the panels of each tier to create long panels for each tier of the skirt. Each tier get progressively longer as they are gathered together to create the desired A-Line Shape.
optimally you go down up. So you begin with sewing the bottom layer to the middle layer and then that piece to the top layer.
In order to that the pieces need to be the same length. Which needs gathering. And thats super annoying. Not hard just really annoying. Even more so when you have like 3m of fabric to gather. To my luck the gathering needed was not too bad…
Anyway to gather I usually hand-gather. Just gets a little neater I think and you can easily correct it as well later if you gathered too much or too little.
You select the longest straight stitch your sewing machine has and sew two paralell lines. Keep some tails of like 10cm hanging at the beginning and end of each seam. Secure the top threads of each of the tails by tying a knot or something. I usually use a sewing pin and wrap the loose top-thread around it. Then you can pull on both bottom threads to gather to the needed length and neaten them. Then sew together the tiers.
Finally I needed to attach the Skirt to the bodice. The edge of the top tier needs to be as long as the front bodice and the stretched out shirring panel. I think. The instructions were kinda inconclusive on that and I had to watch some other video of someone making a JSK.
It really is no fun to few a panel that always to tighten because of the elastic… I really need some better technique since it turned really messy quick. Annoying. But still for a fitting test neat was not needed. Just needed to be the correct size lol. For the real thing I will need to take more time and go slow.
The finished Mock-up Piece
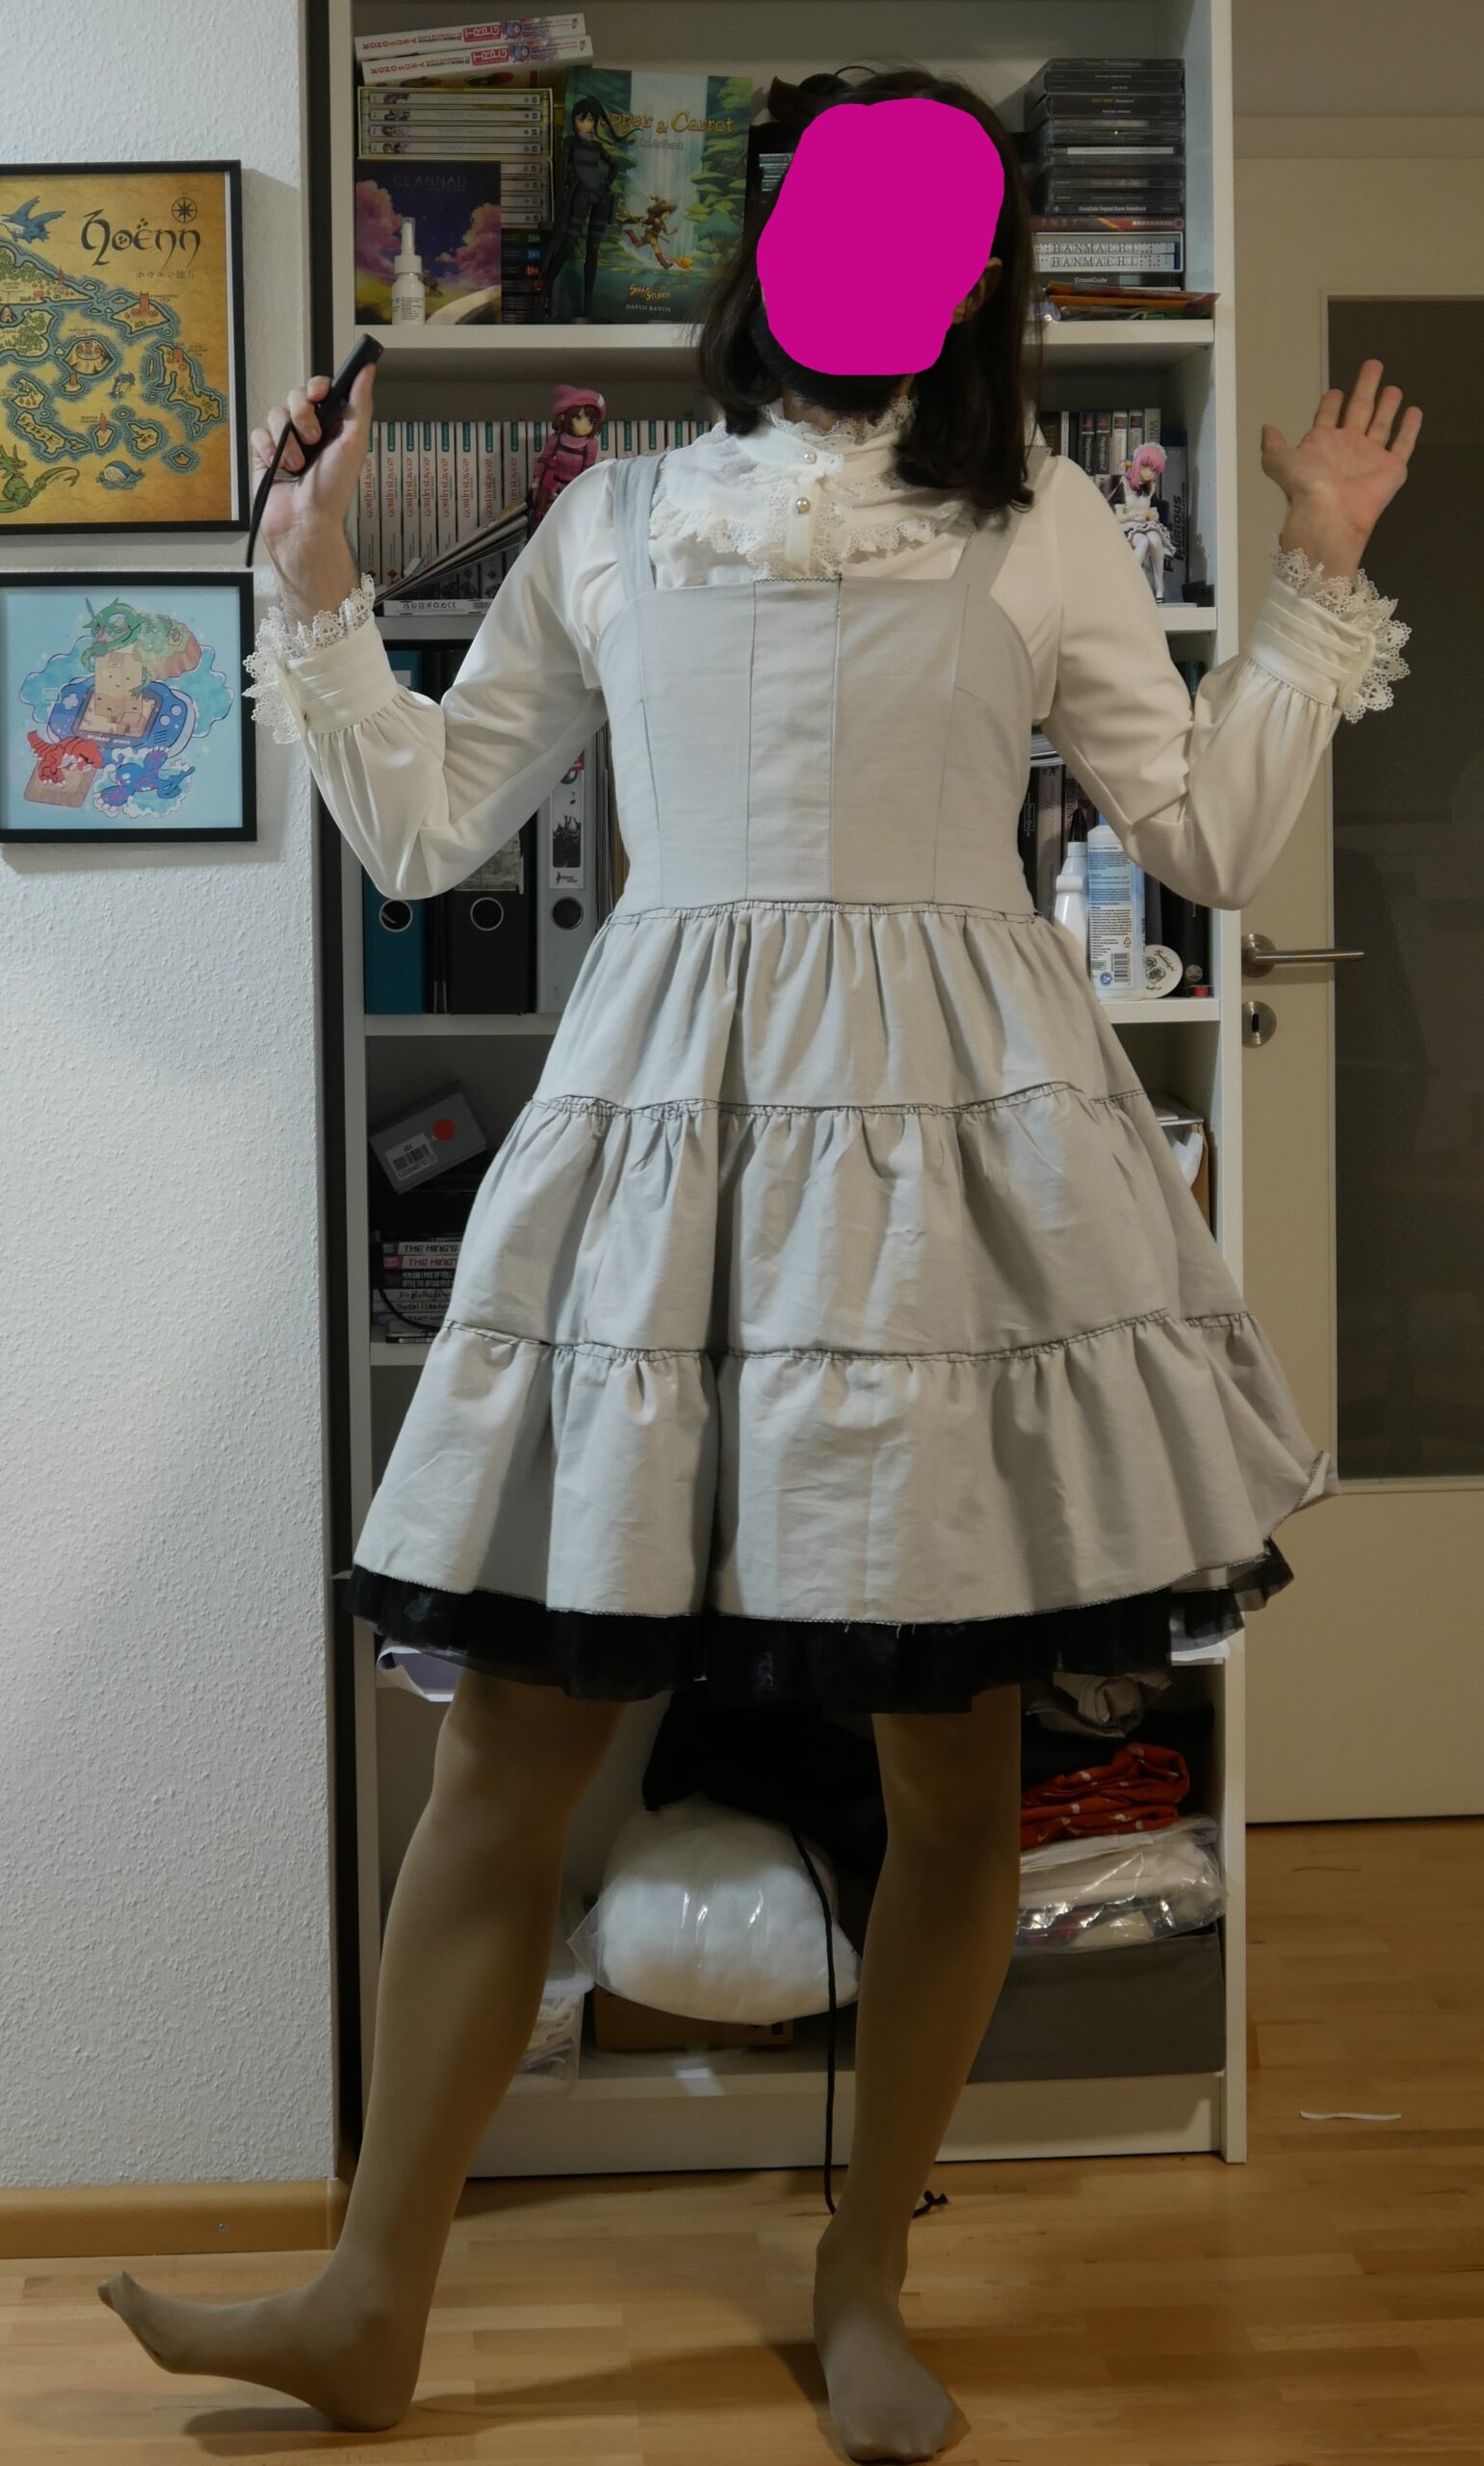
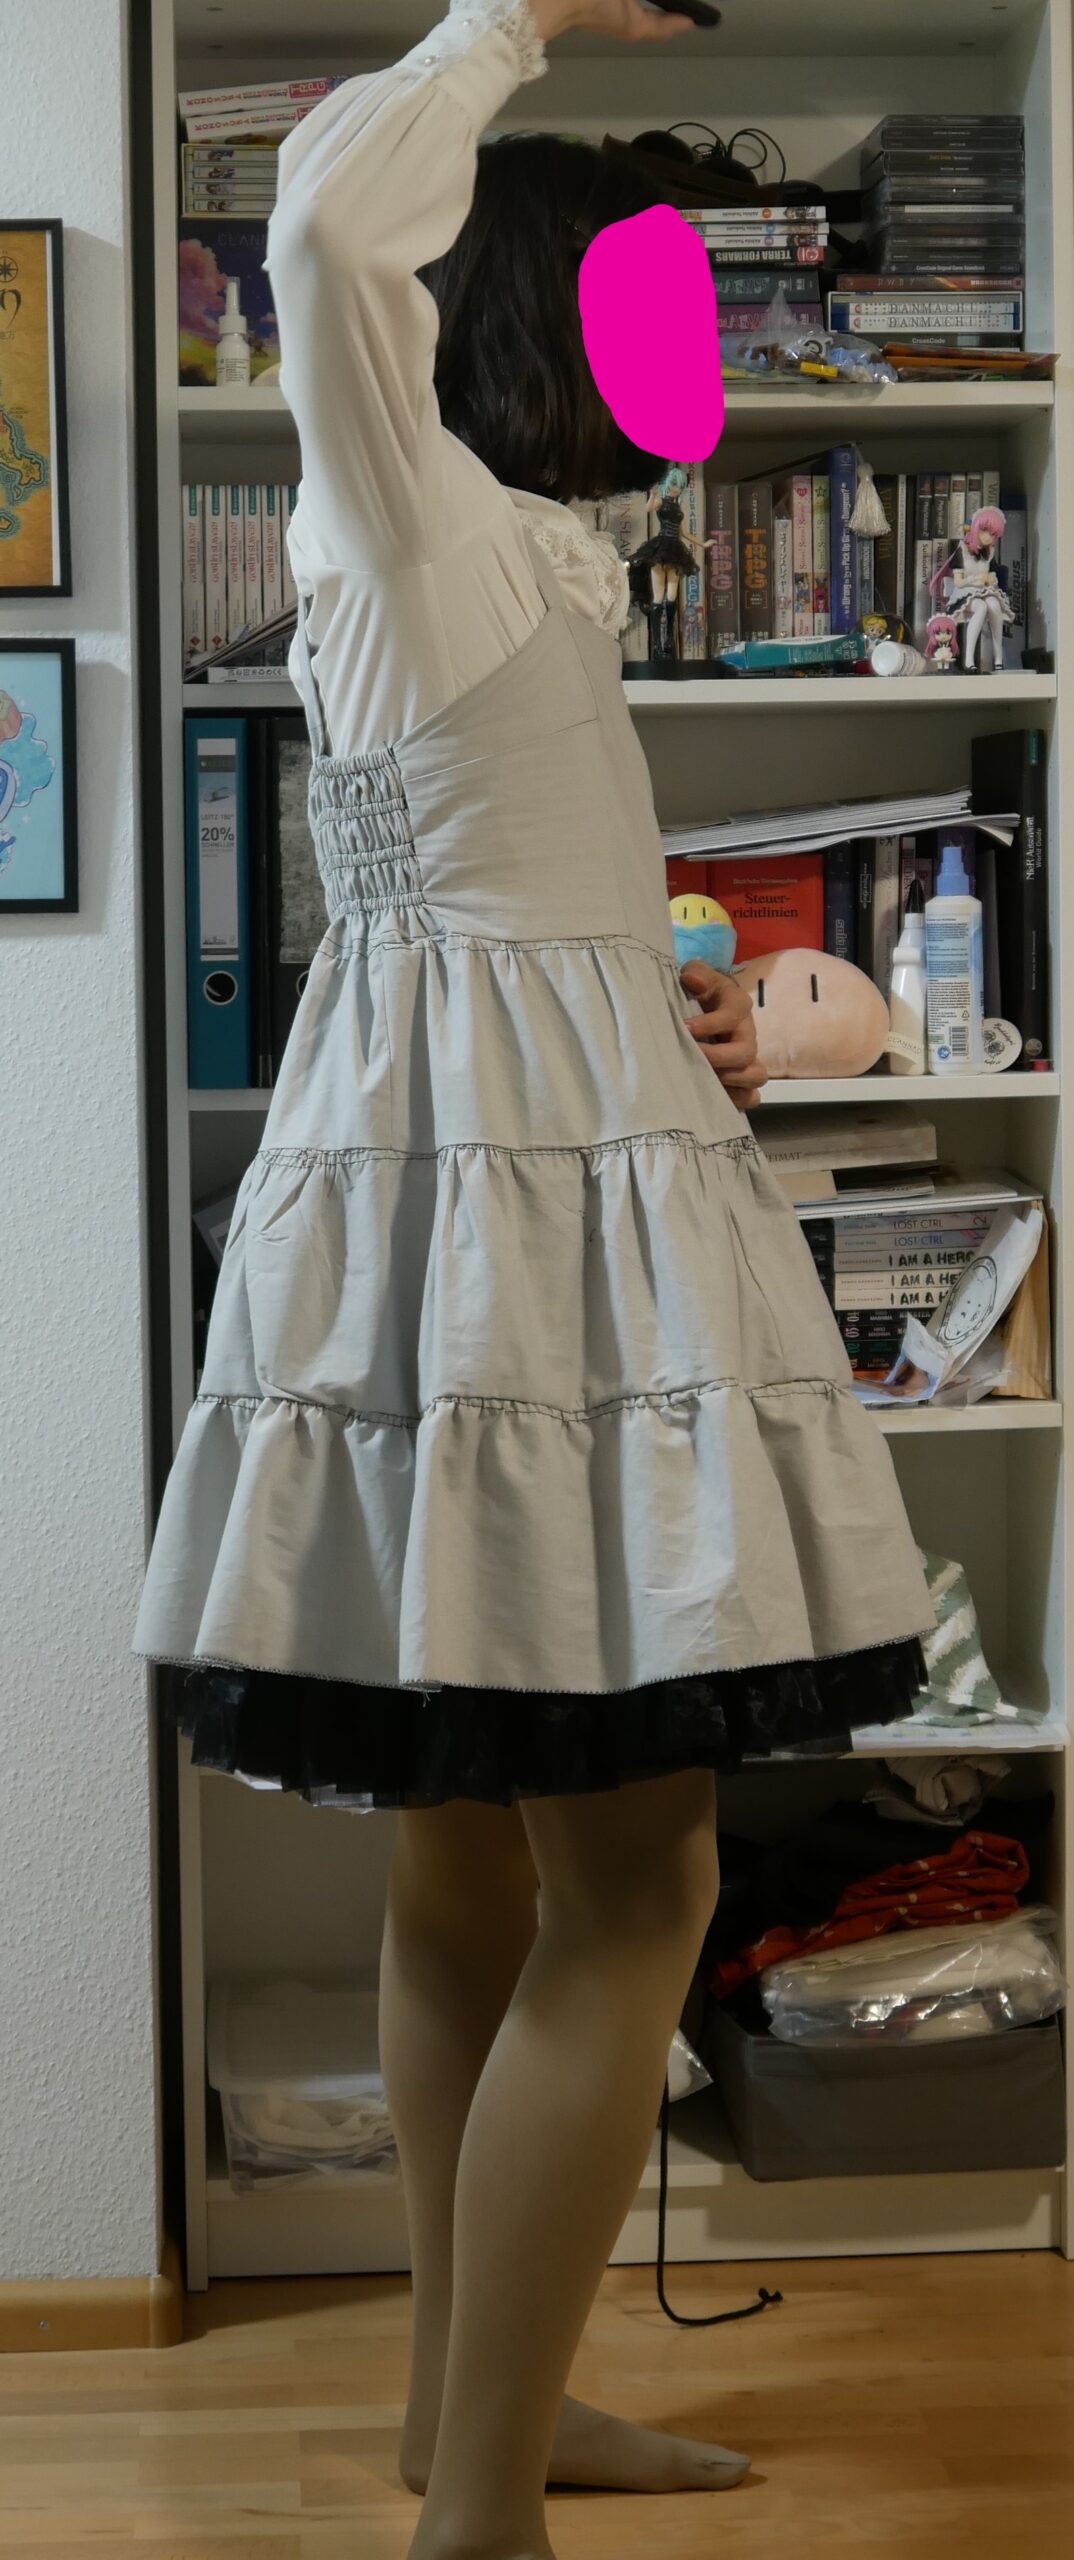
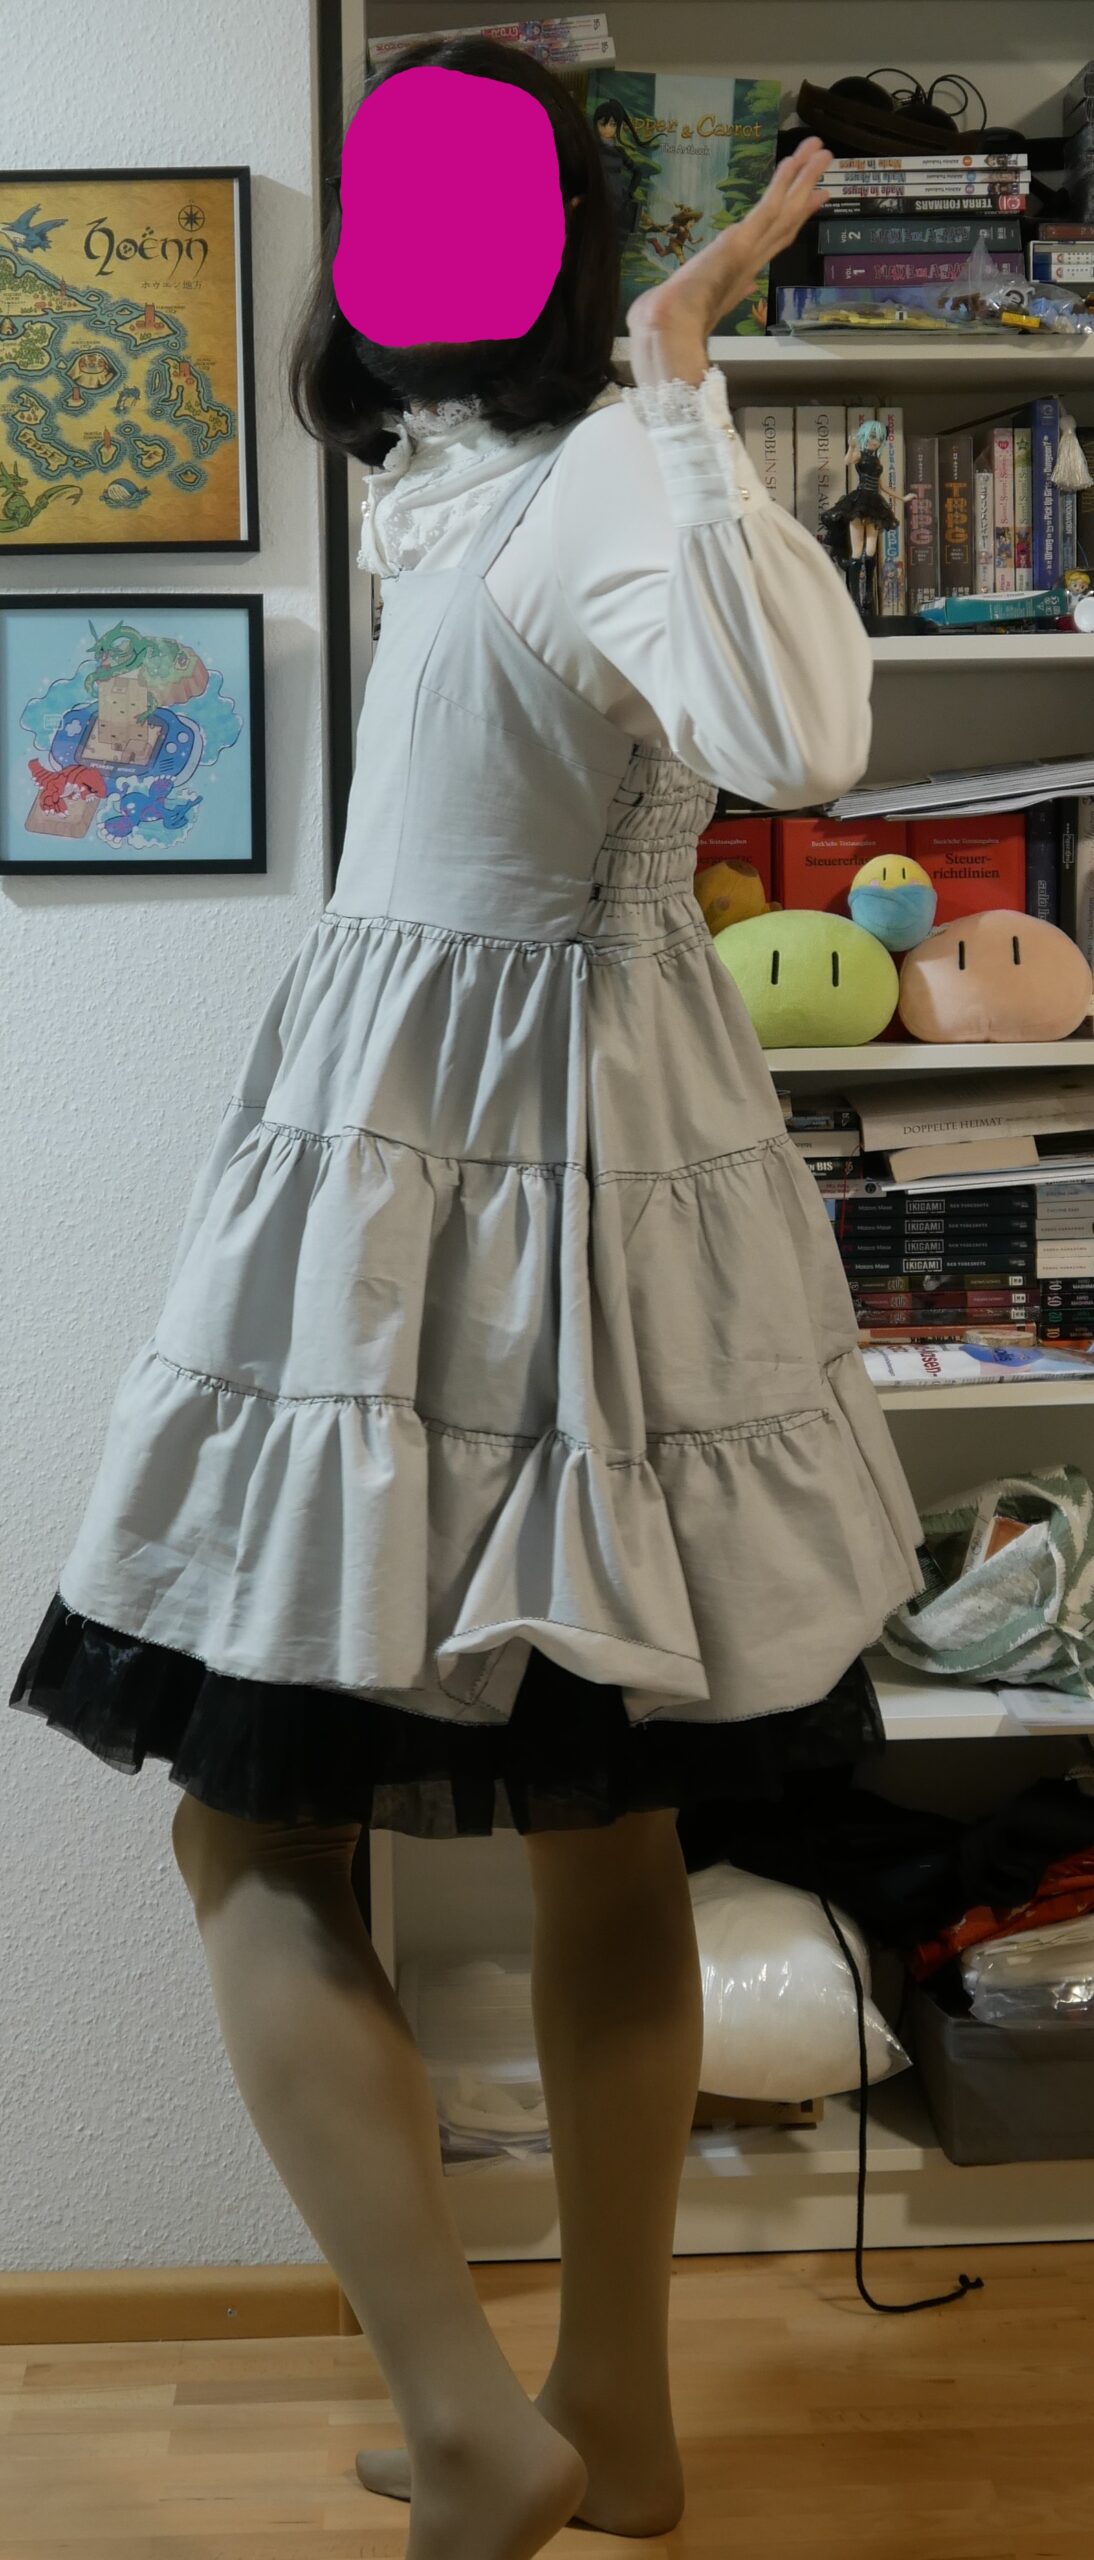
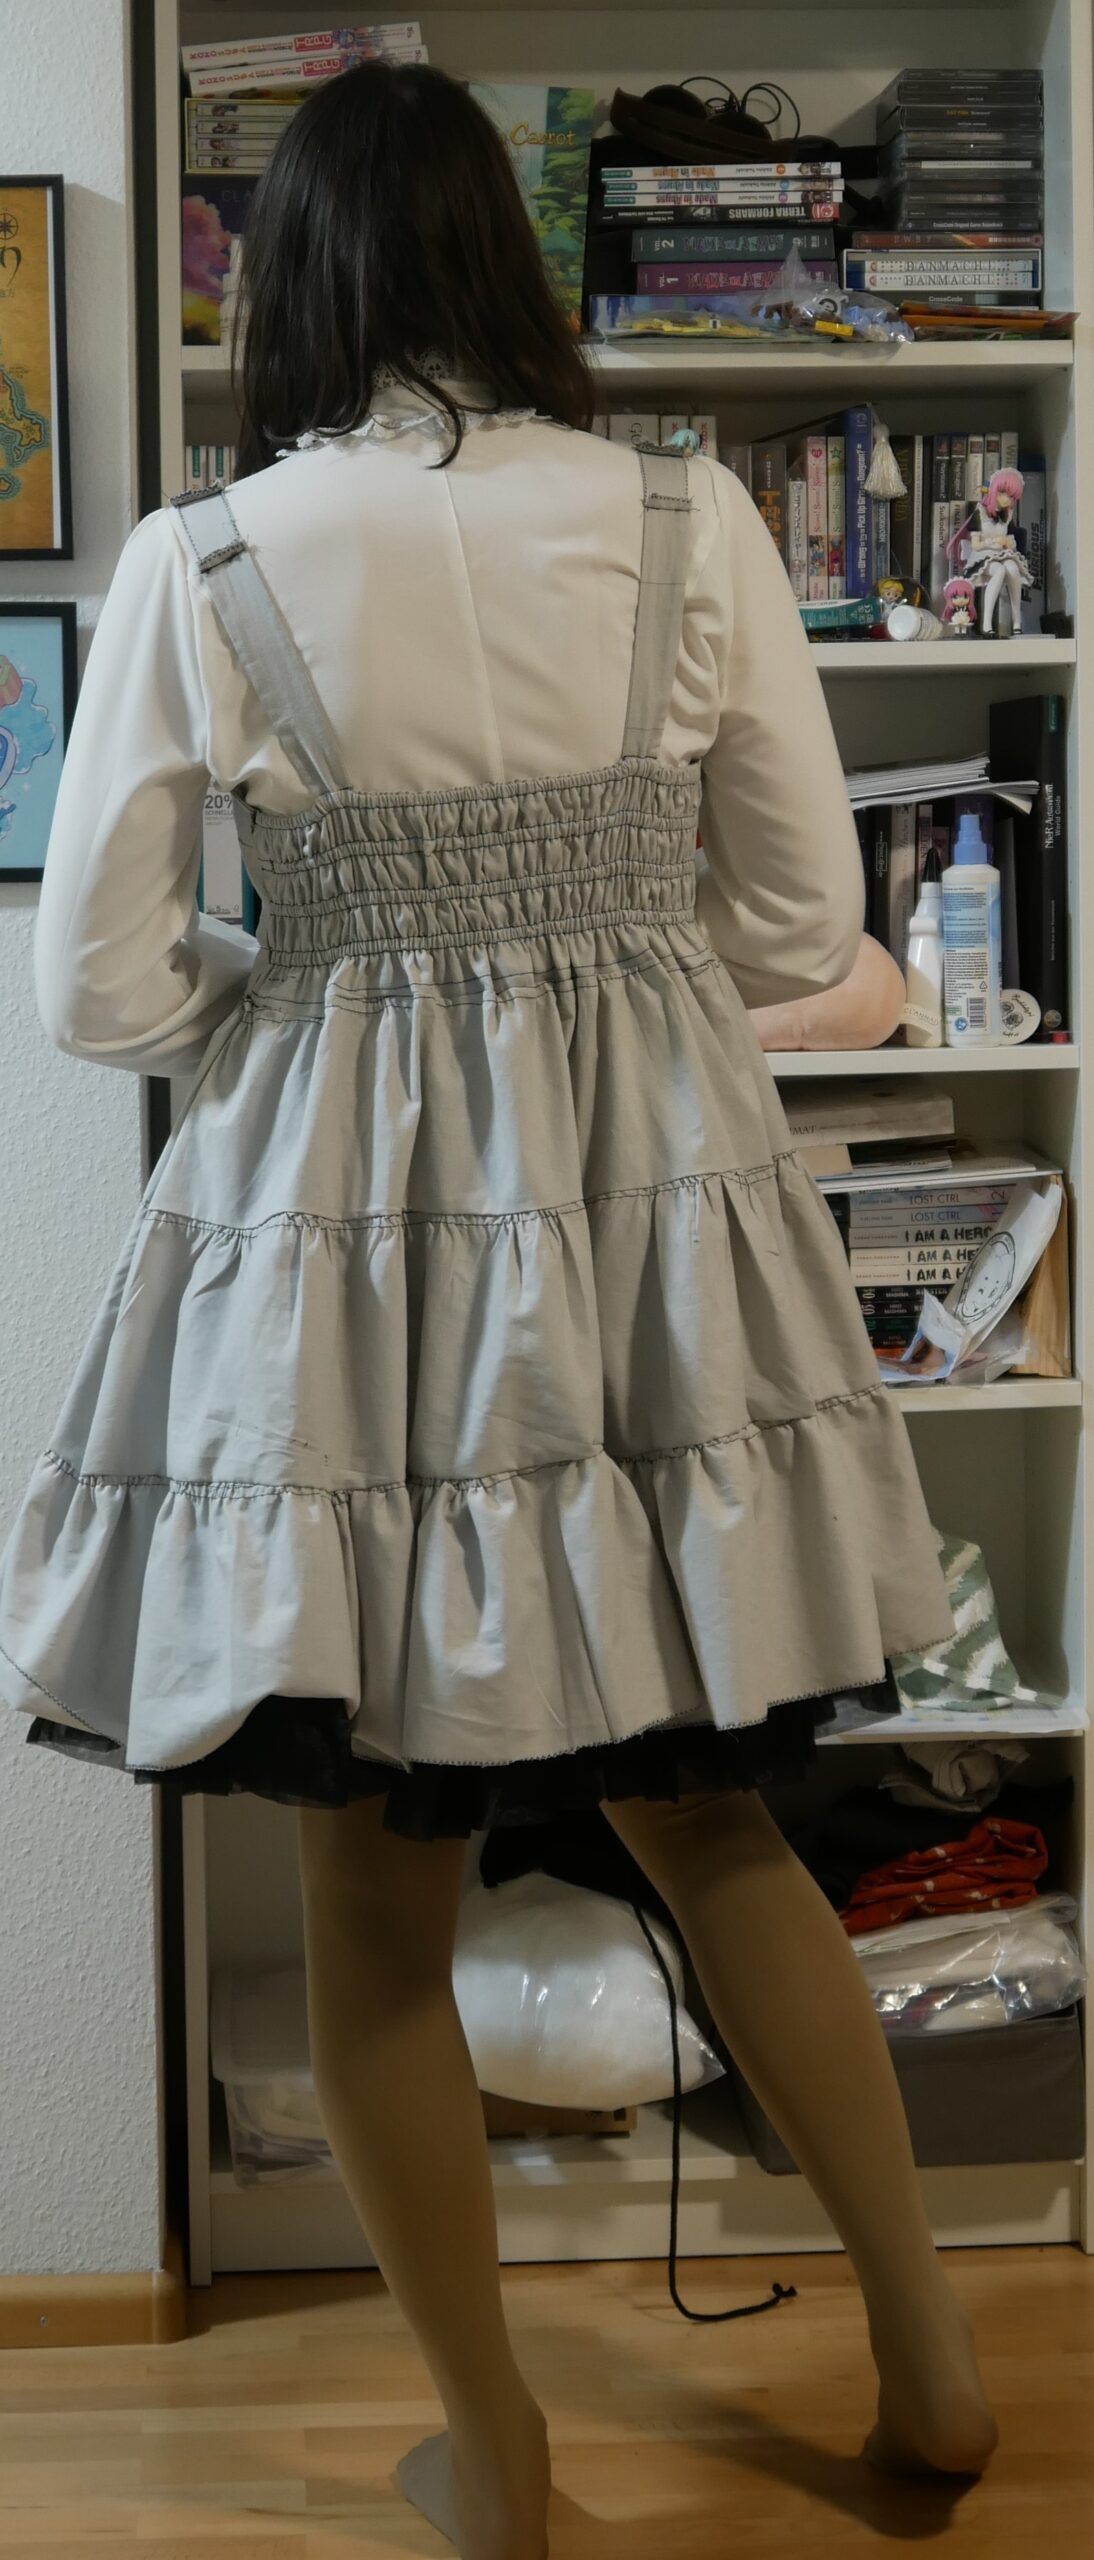
Grand reveal! To end this way too long already blogpost here is the whole thing assembled. I did not make all those bows and did not add the waist ties though. I might just use buttons for the Ties maybe? I will see. I also did not neaten it up by like removing all the gathering stitches. Its work for nothing on a trial piece like this. For the real deal these obvs. need to picked. Also no lace was used, since why waste it here.
I am still waiting on the right length petticoat as well. But for trying the too long one is fine. I am really looking forward to making the real deal now that I know where I need to adjust the pattern and how it will fit. (click to enlarge)